On the right side of each product's home page, you can locate the
icon, that will show you all the prices.
In case you wish to order the eXSuite package, but you can't make the full payment at once,
please contact us, and we will provide you separate links to make the multiple payments.
Once all payments are completed, you will receive all the information to download and get the full package, including all your development license keys.
The prices on the website are shown in EUR and USD, while the USD or any other currency
may vary on the daily exchange rate. The EUR/USD conversion rate is handled and controlled
by ShareIt/Digital-River which is our official reseller.
Definitely Yes. All Exontrol products are available for an unlimited time evaluation. Customers are encouraged to fully evaluate the software prior to purchasing a software license. Evaluation software may be downloaded from the Exontrol web site, is fully functional, and includes complete online documentation. During the evaluation period, you can contact
technical support here.
Exontrol believes strongly that no customer should have to buy software in order to find out how well it
works. Software purchases should be based on thorough evaluation of the most current, fully functional technology. Users should be able to test every feature of a software package for functionality and compatibility. Exontrol software can be evaluated with no limitations in capabilities.
Yes. All of our controls are royalty-free and run-time
license-fee free. This means that when you purchase our products (one
copy per developer on your project), you may distribute the component
you purchased with your applications without paying any run-time fees to
us.
You are entitled to get the the latest released
version ( not including the source code, unless you do not have a
subscription for it ), free of charge, for 1 Year from the purchase
date. Our development team is committed to keeping in step with new technology, and
Exontrol' subscription service is a convenient way to ensure your developers are always using the latest versions of our products.
If your subscription is not expired, you can renew the products you
purchased from us here.
Once you renew the products before expiration date you get:
a new year is added to your account ( starting from the date the
product will expire )
during this time you are notified by e-mail about the latest
changes of the products you subscribed for
your subscription provides all product releases, updates
(major and minor) and access to all betas in active development,
while your subscription is active
In case you are registered for eXSuite package:
you will receive the development license keys for the new products
that has been included in the eXSuite package.
All of our controls are royalty-free and run-time license-fee free.
We offer a 15% discount for each additional year to pay once. For instance,
if you want for 2 years, 425 + 425 * .85, 3 years 425 + 2 * 425 *.85 an so on,
where 425 is the price for 1 year-renewal of eXCustomPack (5-pack).
The discount is valid for eXCustomPack or eXSuite package.
The prices for 1-year renewal can be consulted here, under (before) section.
If you are interested in 2 or more years renewal please contact us and provide the following information:
your registered email address
the package you are licensed for: eXSuite or eXCustomPack
the type of the package you want to renew: /COM, /NET or /WPF
the type of license you want to renew: Single, Team or Site
the number of years you are interested in renewing for
Once we got the information from you, we will provide you a link to continue placing the renewal of eXCustomPack or eXSuite package for the number of years you asked.
You are entitled to get the the latest released
version ( not including the source code, unless you do not have a
subscription for it ), free of charge, for 1 Year from the purchase
date. Our development team is committed to keeping in step with new technology, and
Exontrol' subscription service is a convenient way to ensure your developers are always using the latest versions of our products.
If your subscription is expired, you can renew the products you
purchased from us here.
Once you renew the products after expiration you get:
your subscription starts once we receive your renewal order (
placed and paid )
during this time you are notified by e-mail about the latest
changes of the products you subscribed for
your subscription provides product releases, updates
(major and minor) while your subscription is active
In case you are registered for eXSuite package:
you will receive the development license keys for the new products
that has been included in the eXSuite package.
All of our controls are royalty-free and run-time license-fee free.
If you are registered for eXSuite package, you
are entitled to get the the latest released version (not including the
source code, unless you do not have a subscription for it), free of
charge, for 1 Year from the purchase date for each individual product
you are registered for. You are registered for an individual
product/component while you have a development license key for that
product. New released products are not part of your eXSuite maintenance.
Once you renew your maintenance for the eXSuite, you will receive
the development license keys for the new products that has been included
in the eXSuite package.
If you are a registered user of the eXSuite, you will get these new products, as soon as you renew your maintenance for the eXSuite package, starting from listed date
The "What's new" in the control's web page, lists the changes
of the product, including the date when it was initially released.
Yes. We definitely can confirm this. The controls are written from scratch, which
means that there is NO dependency to third runtime libraries such
as MFC, VB, Delphi or anything else. We provide independent components, so no
matter of what programming language you are using for your application,
our component requires the dll files only, nothing else, on a Windows
system
The Dependency Walker tool from Microsoft which is
a free utility that scans any 32-bit or 64-bit Windows module (exe, dll,
ocx, sys, etc.) and builds a hierarchical tree diagram of all dependent modules. For each module found, it lists all the functions that are exported by that module, and which of those functions are actually being called by other modules. Another view displays the
minimum set of required files, along with detailed information about each file including a full path to the file, base address, version numbers, machine type, debug information, and more.
Let's take the Exontrol's eXG2antt/COM component and scan it using
the Dependency Walker, and we get the following:
The required files are only system files. Those files are installed
on any Windows system, else the system is not working at all and you
need a format :). So, in conclusion the components have no external dependencies,
so the component works on any client machine without having to install
all kind of libraries and stuff.
If we give a shot to another gantt component from competition
you can find:
So, there are a lot of required files, and on an clear system, the
component can not be loaded so can not be used, without those required
files. Usually, the more dependencies the more problem on the client
machine with versioning.
Yes. The concept of Isolated COM solves the problem,
so you have to be familiar with. In other words, it means you can use
the /COM version, and your application can use only the DLL you provide,
without being affected by any other application that could install a
newer or older version of the component.
Developers are encouraged to design isolated applications and to
update existing applications into isolated applications for the
following reasons:
Isolated applications are more stable and reliably updated because
they are unaffected by the installation, removal, or upgrading of
other applications on the system.
Isolated applications can be designed so that they always run
using the same assembly versions with which they were built and
tested.
Isolated applications can use functionality provided by the
side-by-side assemblies made available by Microsoft. For more
information, see Supported Microsoft Side-by-side Assemblies.
Isolated applications are not tied to the shipping schedule of
their side-by-side assemblies because applications and
administrators can update the configuration after deployment without
having to reinstall the application. This would not apply in the
case where only one version of the assembly is being made available.
A fully isolated application may be installed by using the xcopy
command. Windows Installer can also be used to install an isolated
application without impact to the registry. For more information,
see Installation of Win32 Assemblies.
Shortly, the Isolated COM allows your application to use ActiveX
components without having to register them.
Currently, we have the following samples that uses exg2antt/com as
isolated ( Registration-less COM Activation ):
Yes. All of our components/products ( excepts
eXMaskEdit ) are
written from scratch. Our components do NOT wrap or subclass
any Microsoft objects or windows such as ListBox, SysTreeView32, SysTabControl32, and so
on.
All /COM components except exTab component can be used in a
VBA environment like MS Access Excel, Word and so on. The exTab component
requires a container that implements ISimpleFrameSite interface.
Unfortunately, the VBA environment doesn't support ISimpleFrameSite
interface.
A Site license provides an easy, cost effective way to
give all of your developers access to the component. A Site
is defined as all computers owned by an individual company
at one physical mailing address. The site version of the control is
not requiring the IClassFactory2 interface. What that means? It means
that you can create or use the control in runtime mode as well in design
mode on a client machine. The retail version doesn't allow using the
control in design mode on the client machine. The site license allows
unlimited developers to use on the development machine, in the same
company. The site version encrypts information about the registered
owner, in the distributable file. The retail version is recommended for
single developers. The team version is recommended for the companies
that have less than 8 developers. The site version is recommended for
companies that has more than 8 developers, or for companies that develop
container applications that require design mode running on the client
machine.
For instance, the System.Windows.Forms.ListBox component uses
the "LISTBOX" window. As you already know sending the
LB_ADDSTRING message to a listbox window adds a new item. Here's a
simple sample that can be used in c#. All that you need to do
before copying the code is to create a new c# application, and to
insert a listbox component to the main form.
[DllImport("User32.DLL")]
public static extern long SendMessage( int hWnd, int Msg, int wParam, string lParam );
private void Form1_Load(object sender, System.EventArgs e)
{
    SendMessage( listBox1.Handle.ToInt32(), 0x0180 /*LB_ADDSTRING*/, 0, "test");
}
Obviously, if you call listBox1.Items.Add("test") the last
thing that listbox does is to call SendMessage function. The things
are the same for ListView, TreeView, ComboBox components, and so on.
In your .NET application, all these mean that you are safe to use an
ActiveX control. Using the ActiveX version will be faster than using
the same version built using c#.
The answer is definitely yes. For instance, if
you know some VB and you have some knowledge about ActiveX programming, it
is enough to know how to use any of our components. If you know C++, you
need to know how to insert an ActiveX control, and how to add a member of
ActiveX type.
Now, few words about why we are using ATL. ATL is the ActiveX Template
Library, a set of template-based C++ classes with which we can easily
create small, fast Component Object Model (COM) objects. ATL gives several
important features like:
All of the power of C++.
No run-time library
A relatively high-level way of abstracting objects and interfaces.
Automatic handling of class factory, object creation, reference
counting, and QueryInterface.
Stock implementations of standard interfaces
ATL is the Active Template Library, a set of template-based C++
classes with which you can easily create small, fast Component Object
Model (COM) objects.
The OLE View tool helps users to check the control's
type library. In order to get the control's type library the OLE View
tool is trying to create the control. The OLE View uses the
DllGetClassObject method and IClassFactory interface to create the
control. Since the control is a licensed ActiveX control, the
IClassFactory2 interface is required, not the IClassFactory interface.
The IClassFactory interface is not able to handle licensed ActiveX
controls, that's why the error occurs. Once again you can use the OLE
View tool on the development machine with no problems. The single way
to check if the control is properly registered on a client machine is
if the DllRegisterServer returns S_OK, or in other words, the regsvr32
returns no errors. The Site Wide License of the component
doesn't use the IClassFactory2 interface.
Usually it is happen when the logged user has no
access to OLE registry key. For every custom control file (.OCX) that
Visual Basic uses, there is an accompanying .OCA file of the same file
name. An .OCA file is a binary file that functions as both an extended
type library file and a cache for the custom control file. When you
are trying to insert an ActiveX control to your VB project using
project components dialog, the VB tries to access the
HKEY_LOCAL_MACHINE\SOFTWARE\Microsoft\Visual Basic\6.0 registry key
where it saves the path to OCA file by creating a new key using the
program identifier for the control's type library. Since, you don't
have access to that key, that's the reason why you cannot insert the
component to the VB. In order to make sure that you have access to
that key open the registry editor and tries to create a new key to the
HKEY_LOCAL_MACHINE\SOFTWARE\Microsoft\Visual Basic\6.0 key. Another
key used by the VB is HKEY_CLASSES_ROOT\TypeLib, so make sure that the
user has access there also. On 32-bit Microsoft Windows systems, a
user must have the correct permissions for access to the system
registry. Change your permissions or have them changed by the system
administrator.
That means that the setup copies the files but it
wasn't able to register the component(s). In order to make sure that
the component is registered go to your system folder, and run the
regsvr32
, and make sure that the registration process was successfully. When
you are installing an Exontrol product make sure that you have
permission to write to OLE registry, and you have write-access to
disk. We recommend installing the software using Administrator
accounts.
Usually, the samples of the component goes to: C:\Program Files\Exontrol\COMPONENT\Sample, where COMPONENT is the
name of the product like: ExG2antt, ExG2antt.NET, ExG2antt.WPF, and so on.
If this folder is missing or empty one of the following could happen:
you installed the registered version, which comes with only required stuff only (no samples)
you installed the product with SAMPLE Pack unchecked
If this is happen, you should:
download and install the trial/evaluation version from the website
make sure that the SAMPLE Pack is checked on the setup
if you are a registered user, reinstall the registered setup.
This will NOT remove the samples or the documentation of the
control, so only required files of registered product are installed.
Any of Exontrol setups install and register one or
more ActiveX controls. Registration of an ActiveX control requires
write permission to the HKEY_CLASSES_ROOT OLE registry key. This is a
general rule, and it is not an Exontrol rule. Make sure that you
install the Exontrol software using an Administrator account.
Locate the file "uninstall.exlog" in the
folder where you have installed the component. By default the
control's path is: "C:\Program Files\Exontrol\ControlName".
Once that you have found the file you have to run the install program
again using this file as argument, or you can associate for "exlog"
files the install program, and then dblclk on your Windows Explorer.
We are using our own installer called: "Exontrol Installer/Uninstaller Tool",
formerly "Exontrol ExInstall Setup Generator". Our installer
just copies samples, documentation and the control's dll to your
machine. The "uninstall.exlog" file contains the list of files/folders being
copied/created on your machine.
info If your
intention is installing a NEWER version, you should know that
uninstalling the previously version is NOT required. Shortly, simple
re-run the new setup and it will install the new component including
new properties, methods, events, samples, documentation by overriding
the older version ( if it exists ). Before installing you should only
close any application or project that uses the component you want to
reinstall or an error message will be displayed like in the following
screen shot:
Just click the Retry button, after you closed all projects
or applications that may
use the component you want to reinstall. This can be the most common
error, you can encounter during reinstallation.
/silent option performs the installation of the product
without usage of UI. For instance, running the 'print.net.exe
/silent' installs the eXPrint/NET component without showing the
default user interface. You can create your own batchfile to
install components one by one, without having to click the Install
button for any of them. The /silent option is valid for exontrol
installers from version: 6.1.0.1 ( Locate the installer in the
windows explorer, and hover the mouse on the exe file so the
version of the installer will be located on 'File version:' field
). The installer can be recognized as "Exontrol ExInstall
Setup Generator" on field 'File description:'.
The eXSuite package provides batch
files like: "_silent_install_all_.bat" or "_silent_update_all_.bat",
that helps you to silent install all the components.
The first argument or option that does not start with the /
character indicates the path to the exlog file. The exlog file is used
for uninstalling the component. For instance, the command 'print.exe
"C:\Program Files\Exontrol\ExPrint\uninstall.exlog"' will
unistall the eXPrint/COM component. Locate the file "uninstall.exlog"
in the folder where you have installed the component. By default the
control's path is: "C:\Program Files\Exontrol\ControlName".
Once that you have found the file you have to run the install program
again using this file as argument, or you can associate for "exlog"
files the install program, and then dblclk on your Windows Explorer.
You M U S T use the development installer only on the development
machine. You M U S T not use the registered installer on the client
machine. Please check the What files do I need to
install on the client machine? to install the component and
your application on the client machine.
In case of:
"The system cannot execute the specified program" error message, ensure that you have no some anti-virus solutions (AppLocker) that may lock running the executable.
Currently all of our UI components are DEP compatible
Named NX by AMD, DEP by Microsoft, and XD by Intel, this technology
requires CPU support that helps prevent code from executing in data
segments. Most modern Intel CPUs support this capability today and all
current AMD CPUs support NX. DEP support was first introduced in
Windows XP SP2 and is a critically important defense in Windows Vista.
Data Execution Prevention may accidentally shut down legitimate process from valid applications or services, particularly third-party installers used by software developers that release their products for download through the
Web. To make thing worse, DEP normally does not or fails to display or show any warning or information or acknowledgment message prompt that can let you know that DEP has shut down a process, thus causing you unaware of the reason why your setup file cannot run, or why your computer cannot start a service and etc.
Verify the DEP setting in your Windows Vista:
1. Click Start
2. Click All Programs
3. Click Accessories
4. Right Click on Command Prompt
5. Left click on Run as Administrator
6. Click the Allow button if it asks you for permission
7. Type or copy and paste this into the command prompt window:
bcdedit.exe
8. Hit enter and the output displays the status of your DEP in Windows
Bool Loader named nx. For instance: nx Always On
Disable DEP in Windows Vista:
1. Click Start
2. Click All Programs
3. Click Accessories
4. Right Click on Command Prompt
5. Left click on Run as Administrator
6. Click the Allow button if it asks you for permission
7. Type or copy and paste this into the command prompt window:
bcdedit.exe /set {current} nx AlwaysOff
8. Hit enter and you should see the confirmation: Operation Completed Successfully
9. Reboot and DEP should be off.
Enable DEP in Windows Vista:
1. Click Start
2. Click All Programs
3. Click Accessories
4. Right Click on Command Prompt
5. Left click on Run as Administrator
6. Click the Allow button if it asks you for permission
7. Type or copy and paste this into the command prompt window:
bcdedit.exe /set {current} nx AlwaysOn
8. Hit enter and you should see the confirmation: Operation Completed Successfully
9. Reboot and DEP should be on.
I have installed the trial version of eXTree/COM,
eXEdit/COM, but I am
still not able to place the control to a form/dialog as it gets:
Microsoft Visual Basic, License information for this component not found. You do not have an appropriate license to use this functionality in the design environment.
Microsoft Visual C++, The Active X control cannot be instantiated.
Microsoft Visual C++, The ActiveX control could not be instantiated because it requires a design-time license.
Microsoft Visual Studio, Failed to create component 'AxHost'. The error message follows:
'System.ComponentModel.LicenseException: You must have a license to use this ActiveX control.
Microsoft Visual FoxPro, OLE error code: 0x80040112: Class is not licensed for use
In order to avoid this problem run regsvr32 /u extree.dll or
regsvr32 /u exedit.dll before installing, or in other words
uninstall any previous version of eXTree / eXEdit controls. This could
happen if you previously installed another component from us, that
installs the eXHelper
tool, that uses and installs the eXTree and eXEdit registered
versions.
In order to avoid this problem run regsvr32 /u extree.dll
AND regsvr32 /u exedit.dll before installing the exhelper tool, or in other words
uninstall any previous version of eXTree / eXEdit controls. This could
happen if you previously installed another component from us.
This occurs because the DLL on your PC is still an evaluation version. The registered DLL does not display a logo or the message "This message doesn't appear in the registered version"; only the evaluation DLL does.
You should do the following:
If this happen on your development machine, you need to
reinstall the setup you have received when you purchased the
component.
If this is happen on the client machine, copy the dll from Your
development machine, on the client machine. Please check the "What files do I need to install on the client machine?",
that shows the steps you need to follow in order to include the
component on your setup.
Please pay attention to:
your application configuration, whether you are running a 32-bit or 64-bit application,
and which version of the control (32-bit or 64-bit) you are using. For example, you might have
bought and installed the 32-bit version of the control but you are using the control with a 64-bit
application. In a 64-bit operating system, there are separate directories for storing 64-bit
and 32-bit binaries (executables and DLLs). A 64-bit application runs in its own memory space, separate
from 32-bit processes. As a result, a 64-bit application cannot directly load or use 32-bit DLLs because
they are not compatible due to differences in memory addressing and calling conventions.
the fact that any evaluation setup cannot be transformed into a registered version.
Shortyl, it's impossible to convert an evaluation DLL into a registered DLL.
When installing any version, it replaces the previous one. For example, if you've already installed your
development setup and later install the evaluation version, it will override the registered version.
A dynamic link library (DLL) is a collection of small programs, any of which can be called when needed by a larger program that is running in the computer.
An assembly is the unit of deployment and identity for managed code programs. Although assemblies can span one or more files, typically an assembly maps one-to-one with a DLL.
Exontrols' dll name convention is:
/COM/ActiveX/OCX
The ActiveX/COM component is implemented in DLLs such as ex<control>.dll,
where the <control> is the name of the component. For
instance: exgrid.dll, exgantt.dll, exg2antt.dll, and so on. A new
version of the ActiveX/COM component does not change the name of
the DLL, instead the Version property returns the version of the
file/component you are running.
/NET Assemblies
/NET component is implemented in DLLs such as exontrol.ex<control>.dll,
where the <control> is the name of the component. For
instance: exontrol.exgrid.dll, exontrol.exgantt.dll,
exontrol.exg2antt.dll, and so on. A new version of the /NET
component does not change the name of the DLL, instead the Version
property returns the version of the file/component you are
running.
/WPF Assemblies
/WPF component is implemented in DLLs such as wpf.exontrol.ex<control>.dll,
where the <control> is the name of the component. For
instance: wpf.exontrol.exgrid.dll, wpf.exontrol.exgantt.dll,
wpf.exontrol.exg2antt.dll, and so on. A new version of the /WPF
component does not change the name of the DLL, instead the Version
property returns the version of the file/component you are
running.
and Choose 4 ( MSI : This installs the ActiveX and .NET Assembly on your machine, as MSI ( Windows Installer File ). The MSI setup comes with samples, documentation for both versions
).
use eXInstaller Online
Download and Run the ExInstaller, and get
online the same product, from the Available Online List. The ExInstaller is a software component and application programming interface (API) for Microsoft Windows OS used for the installation, maintenance, and removal of our
software.
We believe / suppose that the real-threat Win32/Fathale.B!plock is a pain,
but not like all detected items are indeed a true-threat, so as far of our
installer, we are 100% sure that's clean and safe, because:
the installer computes and displays in the lower-right corner a checksum, that's
mostly impossible to cheat ( like shown bellow ). The checksum may be different
from a version to another, from a component to another, and so on. The
checksum it's an a + b + c equation, but you do not know where a, b or c is
from, and how many a, b, c variables the equation has indeed...
we wrote the installer from scratch using Microsoft Visual Studio
C++, as a standalone piece
Changes the solution platform from "Any
CPU" to "x86". This is required, because the MSI
installer installs the 32-bits version of the component. Click the
"Configuration Manager", click "<New...>"
from "Active solution platform" field, and select
"x86" platform. Letting "Any CPU" on a 64-bits
machine, builds a x64 application, which requires 64-bits version of
the components. If you have installed the x64 version of the
component, the application will run, else the exception "Unable to load DLL : The specified module could not be found. (Exception from
HRESULT: 0x8007007E)" occurs.
If you plan to deploy your application for 64-bits platforms, you
need to install both versions of the component: 32 and 64-bits
versions.
The 32-bit version is for 32-bit applications. The 32-bit
applications can run on a 64-bit Windows operating system under WOW64.
The 64-bit version is for 64-bit applications only, and the x64
application can use only 64-bit version of the component.
On Windows 64-bit edition, the most probably is that
you are running the form that contains a 32-bit edition of the
component, while the project's configuration is Any CPU
A). Install the 64-bit version of the component, and run the form
again. The devenv is a 32-bit process, there is no devenv on 64-bit,
so when you are running the form in design mode, the devenv sees the
32-bit edition of the component. Once you build and run the project (
for 64-bit or Any CPU on Windows 64 ), the 64-bit process sees only
the 64-bit edition of the component, not the 32-bit edition, so the
IDE gives the error as "Class not registered".
B) Change the project's configuration to x86 platform and run the form
again. In this case, you are running the built project as 32-bit, so
the component is visible at runtime. If your intention is porting your
application on 64-bit, you need to install both 32 and 64-bit editions
of the component on the development machine. The 32-bit is required
for development in devenv 32-bit, while the 64-bit edition is required
only for running the project in 64-bit. Your installer should include
only the 64-bit edition the client machine.
By default, the 32-bit edition of the component goes to
\windows\SysWOW64, while the 64-bit edition of the component goes to
\windows\system32. The \Windows\SysWOW64 directory is where 32-bit
system files are installed. 64-bit system files are in the
\Windows\system32 directory for compatibility reasons. The samples of
the component under 32-bit go to \Program Files(x86) directory, while
the samples of the 64-bit edition go to \Program Files. Windows x64
Edition redirects the \Program Files directory for all programs that
are 32-bit during the installation to the \Program Files(x86)
directory. Programs that 64-bit are installed into the \Program Files
directory.
On Windows 64-bit edition, the most probably is that you are running the form that contains a 32-bit edition of the component, while the project's configuration is Any CPU.
A). Install the 64-bit version of the component, and run the form again. The devenv is a 32-bit process, there is no devenv on 64-bit, so when you are running the form in design mode, the devenv sees the 32-bit edition of the component. Once you build and run the project ( for 64-bit or Any CPU on Windows 64 ), the 64-bit process sees only the 64-bit edition of the component, not the 32-bit edition, so the IDE gives the error as "Unable to load DLL".
B) Change the project's configuration to x86 platform and run the form again. In this case, you are running the built project as 32-bit, so the component is visible at runtime. If your intention is porting your application on 64-bit, you need to install both 32 and 64-bit editions of the component on the development machine. The 32-bit is required for development in devenv 32-bit, while the 64-bit edition is required only for running the project in 64-bit. Your 64-bit installer should include only the 64-bit edition the client machine.
By default, the 32-bit edition of the component goes to \windows\SysWOW64, while the 64-bit edition of the component goes to \windows\system32. The \Windows\SysWOW64 directory is where 32-bit system files are installed. 64-bit system files are in the \Windows\system32 directory for compatibility reasons. The samples of the component under 32-bit go to \Program Files(x86) directory, while the samples of the 64-bit edition go to \Program Files. Windows x64 Edition redirects the \Program Files directory for all programs that are 32-bit during the installation to the \Program Files(x86) directory. Programs that 64-bit are installed into the \Program Files directory.
A). Install the 64-bit edition of the component also. The devenv is a 32-bit process, there is no devenv on 64-bit, so when you are running the form in design mode, the devenv sees the 32-bit edition of the component. Once you build and run the project ( for 64-bit or Any CPU on Windows 64 ), the 64-bit process sees only the 64-bit edition of the component, not the 32-bit edition, so the IDE gives the error as
"System.BadImageFormatException: An attempt was made to load a program with an incorrect format. (Exception from
HRESULT: 0x8007000B)".
B) Change the project's configuration to x86 platform and run the form again. In this case, you are running the built project as 32-bit, so the component is visible at runtime. If your intention is porting your application on 64-bit, you need to install both 32 and 64-bit editions of the component on the development machine. The 32-bit is required for development in devenv 32-bit, while the 64-bit edition is required only for running the project in 64-bit. Your 64-bit installer should include only the 64-bit edition files on the client machine.
If your intention is porting your application on 64-bit, you need to install both 32 and 64-bit editions of the component on the development machine. The 32-bit is required for development in devenv 32-bit, while the 64-bit edition is required only for running the project in 64-bit. Your installer should include only the 64-bit edition the client machine.
The most probably you have installed the 32-bit component on a Windows 64-bit system.
There are 2 options to fix this problem:
A). Changes the solution platform from "Any CPU"
to "x86", so your application is 32-bits.
B). Installs both versions of the component: 32-bit and the 64-bit version. This is valid for /COM, /NET or /WPF setup. Even if you are running a Windows 64-bit system, the 32-bit version of the component is not visible for
64-bits applications as it can gives: Class not registered or
"Cannot find file .net".
You need to install both setups (32 and 64-bits of the component)
on the Windows 64-bit system:
For programming you may still need the 32-bit version. For instance, Visual Studio 2010 is a 32-bit application and when installed on a 64-bit Windows operating system will run under WOW64
The 64-bit version is for 64-bit applications only
In conclusion:
you require 64-bit version of the component, if your application
is 64-bit. If your project is set to Any CPU and running on
Windows 64-bit, the application is actually a 64-bit, so it
requires the 64-bit version of the component.
you require 32-bit version of the component, if your application
is 32-bit. The 32-bit applications can run on a 64-bit Windows
operating system under WOW64. If your project is set to Any CPU
and running on Windows 64-bit, the application is actually a
64-bit, so it requires the 64-bit version of the component. If the
project's platform is set on x86, the 64-bit version is not
required.
On Windows 64-bit edition, the most probably is that you have installed the 64-bit edition of the component, while the VS IDE requires the 32-bit edition. The devenv is a 32-bit process, there is no devenv on 64-bit, so when you are running the form in design mode, the devenv sees the 32-bit edition of the component.
A) Install the 32-bit edition of the component, and you will be able to insert the component on the form.
If your intention is porting your application on 64-bit, you need to install both 32 and 64-bit editions of the component on the development machine. The 32-bit is required for development in devenv 32-bit, while the 64-bit edition is required only for running the project in 64-bit. Your installer should include only the 64-bit edition the client machine.
Use the depends tool (Dependency Walker) to load the library. Dependency Walker is part of several Microsoft products, such as Visual Studio, Visual C++, Visual Basic, Windows 2000/XP/2003 support tools (on the Windows CD), Windows 98/NT/2000/XP/2003 Resource Kits, Platform SDK, Windows
DDK, Windows SDK, and MSDN. There are also several places on the Microsoft web site that it can be downloaded from for free. The depends will give you all information about the loaded library, including third library that the library requires If we are speaking of our components, you must know that there is no third library as
mfc, vb, or any runtime library is required, as they are built from scratch. Only system libraries are required. Anyway without them, there is no system.
By default, the 32-bit edition of the component goes to \windows\SysWOW64, while the 64-bit edition of the component goes to \windows\system32. The \Windows\SysWOW64 directory is where 32-bit system files are installed. 64-bit system files are in the \Windows\system32 directory for compatibility reasons. The samples of the component under 32-bit go to \Program Files(x86) directory, while the samples of the 64-bit edition go to \Program Files. Windows x64 Edition redirects the \Program Files directory for all programs that are 32-bit during the installation to the \Program Files(x86) directory. Programs that 64-bit are installed into the \Program Files directory.
Yes, the control works on Windows 64-bit as follows:
The 32-bit version of the component can work with 32-bit
application only, on Windows 32-bit or Windows 64-bit, under
WOW64.
The 64-bit version of the component can work with 64-bit
application only, on Windows 64-bit.
We provide 32-bit and 64-bit configurations for almost of our
components. In conclusion, you require the 32 or/and 64-bit version of
the component based on the type of your application. For instance, if
you plan to have only 32-bit application, you need only the 32-bit
version of the component, you do not need the 64-bit version of the
component. If your application is for 64-bit, you require the 64-bit
version of the component too. For programming you may still need the
32-bit version. For instance, Visual Studio 2010 is a 32-bit
application and when installed on a 64-bit Windows operating system
will run under WOW64.
We provide 32-bit and 64-bit configurations for almost of our
components. In conclusion, you require the 32 or/and 64-bit version of
the component based on the type of your application.
For Development:
if
you plan to have only 32-bit application, you need only the 32-bit
version of the component, you do not need the 64-bit version of the
component.
if your application is for 64-bit, you require the 64-bit
version of the component too. For programming you may still need the
32-bit version. For instance, Visual Studio 2010 is a 32-bit
application and when installed on a 64-bit Windows operating system
will run under WOW64.
For Distribution:
if you plan to distribute your application on Windows 32-bit
only, you need only the 32-bit version of the component
if you plan to distribute your application on Windows 64-bit
only, you need only the 64-bit version of the component
if you plan to distribute your application on Windows 32/64-bit
you need the both or choose the /ANY configuration.
This is applicable to /COM, /NET or /WPF components.
We provide 32-bit and 64-bit configurations for all of our components.
The type of the configuration you need is based on your
configuration/type of your application as follow:
32-bit application, requires 32-bit version of the control. This will work on x64 machines as well.
64-bit application, requires 64-bit version of the control. This will not work on x32 machines.
For instance,
Let's say you are using Access on a 32-bit machine, you need
32-bit version of the /COM component. Now, if you run your
database on a Access x64, you need the 64-bit version of the
component. In case you are using the Access x32 on a Windows x64
machine, you need the 32-bit version of the /COM component.
Imagine you're utilizing the 64-bit version of Visual Code, yet require your application to function in 32-bit mode. You'll need a /COM/ANY version that encompasses both 32-bit and 64-bit variants of the control. Since the Visual Code 64-bit version operates exclusively with files of 64-bit nature, even if you've installed the 32-bit control version, Visual Studio won't recognize the /COM object. If you installed both version you will be able to deploy your 32-bit version (and 64-bit version as well)
Let's say you are developing your application on /NET
Framework using /NET assemblies. If you plan to distribute your application on any Windows 32/64-bit,
you need the /ANY or both 32 and 64-bit version of the /NET
component. If you plan to distribute your application as x86 (
32-bit version ), you need only the 32 version of the /NET
component. If you plan to distribute your application as x64 (
64-bit version ), you need only the 64 version of the /NET
component. Please check also: I get "cannot find file" for /NET or /WPF / "Class not registered (Exception from HRESULT: 0x80040154 (REGDB_E_CLASSNOTREG))" for /COM. What can I do?
In conclusion, you need the 32-bit or/and 64-bit configurations based on the type/configuration of the application/machine you are running your application.
Gantt chart is a time-phased graphic display of activity durations. Activities are listed with other tabular information on the left side with time intervals over the bars. Activity durations are shown in the form of horizontal bars.
The eXG2antt is a superset of eXGantt, so everything that eXGantt supports the eXG2antt supports too.
The eXG2Host is an extension of the eXG2antt ( Exontrol's Grid-Gantt component ) with full database support (ADO, DAO, XML). In other words, the eXG2Host loads and saves automatically the host's data (including the hierarchy) to one or more databases. You can map a data field from the data-source, to a property of one object in the host/gantt control, and the control automatically updates the field when it is required. In the same manner, you can automatically save the control's layout, so next time the control is running it automatically get displayed the same way as it was closed. By default, the eXG2Host component let you add/remove/edit items, child-items, tasks, links and so on without having to code anything. The eXG2Host component supports all features of the eXG2antt component.
A LZW file is a binary file that compress data required by a product /
component, including executables, DLLs, images, documentation, and so on.
Internally, the LZW file can start with LZW or LZM. The eXInstaller
tool is able to view, unpack and install a LZW file. The ExInstaller is a software component and application
programming interface (API) for Microsoft Windows OS used for the installation, maintenance, and removal of our software.
The ExInstaller is the base tool that installs / uninstalls any of our software products. The installation information and the files themselves, are packaged in
installation packages ( .LZW files ).
An EBN file is a binary file that holds information about a skin object. The EBN file provides skin capabilities for almost all of our UI components.
The skin method, in it's simplest form, uses a single graphic file assigned to the client area of the painting object. By using a collection of objects laid over the graphic, it is possible to
define which sections of the graphic will be used as borders, corners and other possible elements, fixing them to their proper position regardless of the size of the painting object.
The skin file ( EBN ) is organized as a hierarchical list of objects. Each object can display a portion of picture with attributes like tile, stretch or transparent or a background color.
The position for each child object is relative to its parent, and can be aligned to any side of the parent's client area. Internally, the EBN file can start with EXBN.
The Exontrol's exButton control is designed to enhance your Windows-based programs by offering the look-and-feel of past and present GUI design elements. The control provides predefined button skins for Windows XP, Windows 95/98, and Mac 8.x buttons. Create your own skins for your buttons in minutes, using a WYSYWG skin builder. The ability to specify everything that control needs like graphical objects, transparent skins, HTML captions as simple text makes the exButton one of the most wanted button control on the market. The exButton control easily replaces the Standard Windows button by supporting most of the same properties, methods and events. In addition, you have complete control over how the button is to be displayed.
Exontrol's ExCalc component provides calculator features to your application. The component provides implementation for basic arithmetic operations like addition, subtraction, division and multiplication. In addition, you can configure the layout of the calculator the way you want, including new mathematical operations. The component provides flat and drop down version, so you can have the calculator into a drop down field too.
Enrich your application with an easy-to-use edit control that supports arithmetic operations. Get results on the fly. The result is displayed as the user types the expression. The control handles double constants and arithmetic operations like +( addition ), - ( subtraction ), / ( division ), or * ( multiply ). The control is fully written in C++ using ATL. The control doesn't require additional files or libraries like MFC or else.
The ExCalendar library contains two components, simple version and drop-down version that allow you to select a date with a nice GUI. You can select the date between 1/1/100 and 12/31/9999, Both versions support images, colors, font attributes, tooltips for any date.
The eXCascadeTree component is a multiple-columns-tree-view component that uses miller columns visualization to display your data. The Miller columns (also known as Cascading Lists) are a browsing/visualization technique that can be applied to tree structures.
The eXComboBox represents some of the most advanced combobox technology available in the components marketplace. A combo box is a commonly-used GUI tool. It is a combination of a drop-down list or list box and a single-line textbox, allowing the user either to type a value directly into the control or choose from the list of existing options.
The eXContextMenu component displays and handles a context menu (also called contextual, shortcut, and popup or pop-up menu). A context menu is a menu in a graphical user interface (GUI) that appears upon user interaction, such as a right-click mouse operation.
The ExDialog control, similar with the Microsoft Office Assistant, is a new type of control that allows attaching pictures to your form or dialog. The control lets you add interactive personalities to your application or Web site.
Add to your applicaton an easy-to-use edit control that supports built-in HTML format, and syntax highlighting as well. You can define your own keywords and expressions using HTML tags. The control doesn't require additional files or libraries like MFC, VB or anything else, and does not subclass the system's EDIT window class.
The Exontrol's ExEditors Library, contains 16 data edit controls. Each editor can have a three-state check box associated and an unlimited number of buttons on the left or right side. Each button can display an icon or a picture and can have its own tool tip. Most of the editors are mask based.
Provide rich display of file and folder information from within your applications. ExFileView is an ActiveX component for creating Windows Explorer-style functionality. The ExFileView simulates a FolderView control as well.
The Exontrol's eXG2antt component is an editable tree-grid component that includes Gantt chart features. The ex(G)rid-ex(G)antt, shortly exG2antt or ex2Gantt, combines the exGrid and exGantt components in a standalone component. The exG2antt library lets the user changes its visual appearance using skins, each one providing an additional visual experience that enhances viewing pleasure.
The ExG2Host is an extension of the ExG2antt ( Exontrol's Grid-Gantt component ) with full database support ( ADO, DAO, XML). In other words, the ExG2Host loads and saves automatically the host's data (including the hierarchy) to one or more databases. You can map a data field from the data-source, to a property of one object in the host/gantt control, and the control automatically updates the field when it is required. In the same manner, you can automatically save the control's layout, so next time the control is running it automatically get displayed the same way as it was closed.
The Exontrol's ExGantt component is our approach to create timeline charts (also known as Gantt charts). Gantt chart is a time-phased graphic display of activity durations. Activities are listed with other tabular information on the left side with time intervals over the bars. Activity durations are shown in the form of horizontal bars. The exGantt component lets the user changes its visual appearance using skins, each one providing an additional visual experience that enhances viewing pleasure.
The eXGauge / eXLayers library provides graphics capabilities to visually display and edit the amount, level, or contents of something. The view can show one or more layers, where each layer can display one or more transparent pictures, HTML captions which can be clipped, moved, rotated or combination of them, by dragging the mouse, rolling the mouse wheel, or using the keyboard.
The Exontrol's ExGraph component is a versatile tool designed to meet the diverse needs of data visualization. With support for numerous chart types, it empowers users to represent their data in various formats, from simple line charts to complex radar charts, all within the same view. In addition to its extensive charting capabilities, our graph control offers seamless printing and print preview functionality, ensuring that users can easily generate hard copies of their charts with precision and clarity. The exGraph library lets the user changes its visual appearance using skins, each one providing an additional visual experience that enhances viewing pleasure.
Exontrol's new eXGrid control an easy-to-implement tree-grid control, provides swift and robust performance and a wide range of formatting features that distinguish it from other grids. The eXGrid is a multi-purpose data visualization system that can display information as a tree, a grid or list, or a combination of both - in either data-bound or unbound mode. This unique synergy between a traditional grid and a traditional treeview allows you to create cutting-edge and visually appealing application interfaces for your end-users.
Display and edit built-in HTML without relying on Internet Explorer. exHTML is a display/edit engine for our built-in HTML format. It is written from scratch in C++/C#. It does not rely on IE for rendering HTML, and its functionality is similar to a Web browser for display/edit purposes. exHTML can be used for the provision of extremely flexible user interfaces generated on demand. It can also function as a complex layout management system for text, controls, and graphics. The control doesn't require additional files or libraries like MFC, VB or anything else, and does not subclass the system's EDIT window class.
The ExICalendar library implements the ICalendar data format, according with Internet Calendaring and Scheduling Core Object Specification, RFC 5545. The iCalendar data format represents exchanging calendaring and scheduling information such as events, to-dos, journal entries, and free/busy information, independent of any particular calendar service or protocol. The iCalendar format is suitable as an exchange format between applications or systems. The format is defined in terms of a MIME content type.
Add an advanced List control to your application. The exList component displays and edit your tabular data. The exList component lets the user changes its visual appearance using skins, each one providing an additional visual experience that enhances viewing pleasure. Skins are relatively easy to build and put on any part of the control.
The ExListBar component, an accurate reproduction of the Microsoft Outlook Bar, provides an intuitive user-interface when large amounts of information need to be presented. The ExListBar supports horizontal or vertical orientation. The object model is rich and intuitive.
When you have several people entering data in your database, you can define how users must enter data in specific fields to help maintain consistency and to make your database easier to manage. For example, you can set an input mask for a form so that users can only enter telephone numbers in the Swedish format or addresses in the French format.
The ExMenu component is a complete new type of control that displays and handles more than a menu for your application. The ExMenu simulates menu bar, popup menu, options button, toolbar, pick list, and more. Make you application more intuitive using the ExMenu.
The eXMiller component is a file-folder-view component that uses miller columns visualization to display system folders and files. The Miller columns (also known as Cascading Lists) are a browsing/visualization technique that can be applied to tree structures.
Exontrol's new eXMLGrid control provides an innovative grid view look and handles data in XML fashion way. It provides swift and robust performance and a wide range of formatting features never seen on other grids. The eXMLGrid component can be seen as a generalized tree control that allows resizing the node's indentation at runtime. The eXMLGrid component lets the user changes its visual appearance using skins, each one providing an additional visual experience that enhances viewing pleasure. Skins are relatively easy to build and put on any part of the control.
The Exontrol's NAVHost /NET assembly is a Control-AddIn for Microsoft Dynamics NAV environment, that can extend your NAV fields with any UI element of the /NET framework, by using the x-script code.
The ExOrgChart component permits the totally automatic generation of organigrams. An organigram generally provides a clear picture of the hierarchical position of the various actors. The ExOrgChart control shows a hierarchical display of nodes, each one having an HTML caption, pictures and icons aligned to any side of the node.
The ExplorerBar component, an accurate reproduction of the Microsoft Windows XP Explorer Bar, provides an intuitive user-interface when large amounts of information need to be presented.The object model is rich and intuitive.
Add structured navigation functionality to your applications. The ExplorerTree component adds navigation functionality to your applications, it brings simple information structuring and easy application navigation.
The Exontrol's eXPivot tool is our approach to provide data summarization, as a pivot table. A pivot-table can automatically sort, count, total or give the average of the data stored in one table or spreadsheet. The user sets up and changes the summary's structure by dragging and dropping fields graphically.
The ExPopupMenu component allows you to display and handle a shortcut menu (window popup menu) or a window's menu bar. The ExPopupMenu control contains also a MenuButton object that allows attaching a popup menu to a push button. Building the menu is more than intuitive because the control provides a WYSIWYG editor, at design time.
The Exontrol ExPrint component is an advanced printing system specifically to bring your User Interface to the printed page. The ExPrint adds powerful print and preview capabilities to your forms, dialog boxes or other windows. The ExPrint component provides Print and Print Preview features for components like: exGrid, exTree, exList, exCalendar, exComboBox, exPropertiesList, exEdit, exFileView, exOrgChart and so on.
The ExPropertiesList control (similar to the control used to manipulate properties in Visual Studio) provides an efficient, intuitive and visually compact way to handle data input with minimal coding and user interface design.
The eXRadialMenu ( radial or pie menu) component is similar to the Microsoft.s OneNote radial menu with ability to customize the appearance and functionality. The component is designed using tree structure of tools and tool collections within the tools
The eXRibbon component, similar with the Microsoft Office's "Fluent User Interface", or Ribbon, allows you to display graphical control elements in the form of a set of toolbars placed on several tabs.
The ExResizer allows you to resize controls in a form proportionally or maintain the components' anchored sizes and positions. ExReSize alters the sizes and positions of controls on Visual Basic forms as they are sized, without requiring you to write any code! Simply drop the control onto the form, and you instantly have the ability to resize any control proportionally, by selecting the Anchor property. The way how a control can be anchored to one of more container edges is more than intuitive.
Exontrol's new and innovative exRolList control handles and displays lists on an elliptic shape. The exRolList rotates the list to let items being visible, and so no scrolls are required. You never seen such of control so please take your time and check it. Your user interface will be rich, new and attractive.
ExSkin is an ActiveX control that enables you to change the visual appearance of your project's forms, providing you with the skin support. Now you can do: any kind of window captions, frames, client and non-client areas and more. Also, the control contains a Builder component that helps you to create new "skins". The ExSkin ActiveX control it's easy to use, and simple to integrate into your project. So, it is possible now to make your program look like any program from MacOS, BeOS, Unix, and create your Winamp-like user interface.
Add a fuly customizable statusbar to your application. Features include: ability to layout the panels as you wish using the CRD strings, skinning, built-in HTML support, tooltip support, owner draw support, icons, custom-size pictures, WYSWYG Template editor, semi-transparent colors, progress-bar support, and much more...
The ExSwimLane component let's you draw swim lane diagrams. A swim lane (or swimlane diagram) is a visual element used in process flow diagrams, or flowcharts, that visually distinguishes job sharing and responsibilities for sub-processes of a business process. Swim lanes may be arranged either horizontally or vertically.
The Exontrol's eXSplitBar component, helps you to automatically resizes the left/right or top/bottom components, while user drags the split bar to a new position. The splitter control is used to resize docked controls at run time. The splitter control is often used on forms with controls that have varying lengths of data to present, like Windows Explorer, whose data panes contain information of varying widths at different times.
A built from the ground up using 100% C++/ATL-based code, the Exontrol's eXTexture component does cube map texturing. Cube map texturing is a form of environment texture mapping that uses a viewing direction (3D vector) to map into a view plane with six 2D textures arranged like the faces of a cube.
The Exontrol's eXThumbnail component provides thumbnail views for your files. Thumbnails are reduced-size versions of pictures or shell items, used to make it easier to scan and recognize them, serving the same role for images as a normal text index does for words.
The eXToolBar component arranges / groups as rows or columns, any kind of graphical control elements such as buttons, icons, drop downs, editors, and so on, to let user choose quickly, what function / procedure to run. The eXToolBar component is written from scratch, uses EBN technology to let the user changes its visual appearance using skins, and requires no dependencies to any other third party library.
The Exontrol's ExToolTip provides featured tooltips for your application. The tooltip is a common graphical user interface element. It is used in conjunction with a cursor, usually a mouse pointer. The user hovers the cursor over an item, without clicking it, and a small box appears with supplementary information regarding the item being hovered over.
Add an enhanced exTree component to your application. exTree provides the entire range of capabilities you would expect to see in a state-of-the-art tree component. The exTree control simulates a simple tree, a multi-column tree, a list or a listview control.
The eXTreeCube library provides fisheye representation / cube map texturing of different components such as calendar , multiple - columns tree view and so on.
Perform currency conversions. The ExChange library contains two COM objects, ExChange and ExChart. The ExChange is a COM object for performing conversions between a currency and hundreds of other international currencies. The ExChart component display the exchange rates between two international currencies into a given interval. As with any currency converter, it's vitally important that you have the latest exchange rates.
The ExDictClient ActiveX control is a TCP transaction based query/response protocol that allows a client to access dictionary definitions from a set of natural language dictionary databases. The ExDictClient ActiveX control uses the Dictionary Protocol, described in RFC 2229.
A built from the ground up using 100% ATL-based code, The ExEMail can be dropped into any language that supports ActiveX thus enabling an application to support full mail and file attachment transfers. ExEMail is fully SMTP RFC-compliant and provides support for binary (MIME) attachments and HTML email. SMTP authentication supported. You don't need to have installed Oultook, Express, Exchange or whatever.
Exontrol's exHTTP is a HTTP client component that provides easy interface to the HTTP (Hypertext Transfer Protocol) protocol. Its primary purpose is to retrieve documents from the WEB to a string or to a safe array.
The ExInbox ia simple-to-use POP3 client library that allows mail readers to connect to many POP servers and manage email. It implements the client side of RFC 1939. The ExInbox is a free implementation of POP3 protocol for Win32 platforms ( the retail version is free ). The email client can download the entire email message or only message's header. Non-blocking mode supported.
The ExLookupNS COM object is a DNS (Domain Name Service) component that can be used for network diagnosing, troubleshooting, and monitoring. The ExLookpNS allows developers to integrate the DNS protocol message sending capability into their applications. The ExLookupNS's object model is rich, flexible and very intuitive. For instance, the statement .Query("devx.com").MailExchange gives you the list of mail servers. It is fully compliant with RFC 1034, RFC 1035, RFC 1876.
The ExNNTP control is 32-bit light COM that provides easy and flexible way to handle news (NNTP) messages. The Net News Transfer Protocol(NNTP) is a TCP/IP protocol based upon text strings sent bidirectionally over 7 bit ASCII TCP channels. It is used to transfer articles between servers as well as to read and post articles. XOver (overview database ) header are supported. And ExNNTP's Groups and NewsGroups objects which contain Articles objects, which in turn contain Articles, make managing groups and articles very easy. The entire list of articles for any group can easily be downloaded, and left untouched in that Group as other groups are accessed. Once that a message has been sent by the server, the ExNNTP control caches the message for future accessing.
No extra-fee will be charged or asked if you as a customer or not report a bug or a
problem. By a bug we mean a situation that produces a freeze / lock or a crash
within your application, due one or more of our components. By a problem
we mean a mall-function of one or more or our components, not a wish. If you consider that
you have found a bug or a problem, please contact us,
and give us detailed information on how we can replicate the bug or the problem.
In order to confirm that what you report is a bug or a problem, you have to
provide steps to reproduce it, so we can replicate it. As soon as we receive the
bug or problem-request, we will confirm or not that we have been able or not to
replicate it. Once we confirmed that we have been able to replicate it, we will
fix / update the component in NO time. In case you want to test us, just give us
a try, to see how fast we can be! Once again, we need to be able to replicate
it, else it's looking for a needle...
In conclusion, we do not want to have bug(s) or problem(s) with any of our
components, as you wish also for your application, that's why we keep, maintain and improve our products every day, as you can see in
our main page. As a customer, you are entitled to get the the latest released version ( not including the source code, unless you do not have a subscription for it ), free of charge, for 1 Year from the purchase date.
After 1 Year from the purchase date, an annual subscription should be purchased before proceeding to get the latest version of the product you are registered for.
We are working with ShareIt-DigitalRiver an e-commerce provider to provide you with secure, fast and easy-to-use online ordering experience.
An invoice for your order will be issued only after payment is received. For orders paid by credit card or direct debit from your bank account
(electronic debit or online bank transfer), we will issue an invoice immediately. For orders paid by wire transfer, check, or cash, you will
first receive an order confirmation, and the invoice will be issued after payment is received. In any case, we will automatically e-mail your
invoice or order confirmation to your billing address. The order documents are sent with the e-mail as PDF attachments.
In addition, you can view and print your order documents at any time after completing your order. Just log on to the secure "My Account" area.
You will find an overview of your orders and all accompanying documents there. When ordering online, you have the option of printing your own invoice.
Click on "Print Invoice Version" in the lower left corner of the page displayed last. You will also receive an e-mailed invoice together with your order confirmation.
Aplicable to /ALL components, excepts eXSuite/JS library
Yes. A perpetual software license is a type of software license that authorizes an individual to use a program indefinitely. Generally, outside of termination, a perpetual software license allows the holder to use a specific version of a given software program continually with payment of a single fee.
All of our controls are royalty-free and run-time license-fee free. This means that when you purchase our products (one copy per developer on your project), you may distribute the component you purchased with your applications without paying any run-time fees to us.
What's happen before 1 Year:
you are entitled to get the the latest released version ( not including the source code, unless you do not have a subscription for it ), free of charge, for 1 Year from the purchase date
priority support
What's happen after 1 Year:
your application built using one or more of our components will continue to work after 1 year, without any subscription
the component installed on your development machine will continue to be operable, while your OS or programming environment was not reinstalled
After 1 Year, you need a newer subscription if:
you lost your development license key(s)
reinstall the component(s)
request for any version
request for any change
request for support
After you subscribed you have:
priority support
your subscription provides all product releases, updates (major and minor) and access to all betas in active development, while your subscription is active
the latest released version of the product you are subscribed is automatically sent to you as soon as the new version is out, while your subscription is active
Aplicable to eXSuite/JS library
No. The purchased license allows you to use the /JS library for 1 year, as explained:
/Single allows using the eXSuite/JS library on a single dơmain (1 developer)
/Group allows using the eXSuite/JS library on three or more dơmains (3 developers)
/Unlimited allows using the eXSuite/JS library on unlimited dơmains (unlimited developers inside your company)
The /JS license is per dơmain/developer. In other words, once you licensed the eXSuite/JS library, you can use any component of the eXSuite/JS library free of charge, without paying any run-time fees to us, locally or on your registered dơmain(s). Any time you can download, update and use the eXSuite/JS libary from our website.
After 1 year you can still use the eXSuite/JS library, but the message "the license is expired", "the license has expired on ..." may occur. In order to continue using eXSuite/JS library you must choose one of the following renewals:
before renewal, a new year is added to your account starting after 1 year from your last purchase time (cumulative). For instance, your last purchase time is Mar 22, 2021. A "before renewal" on Feb 11, 2022, indicates that the time of your license is extended to Mar 22, 2023. A "before renewal" on Feb 11, 2023, indicates that the time of your license is extended only to Mar 22, 2023. In conclusion, a "before renewal" should be chosen if your license is not expired.
after renewal, a new year is added to your account, starting from the renewal time. For instance, your last purchase time is Mar 22, 2021. An "after renewal" on Feb 11, 2022, indicates that the time of your license is extended to Feb 11, 2023. An "after renewal" on Feb 11, 2023, indicates that the time of your license is extended to Feb 11, 2024. In conclusion, an "after renewal" should be chosen if your license is expired.
You can change the type of license (/Single, /Group, /Unlimited) to renew. For /Single or /Group license type you need to provide the dơmain(s) where the eXSuite/JS library will run.
No. No GUID of any object is changed once a new version is released. Once a new version of the product is released, the Version property is increased. No property, method or event is removed once a new version is released. A new version overrides the old version. You can run a specific version using isolated applications.
The template/x-script code is a simple way of calling control/object's properties, methods/events using strings. Exontrol owns the x-script implementation in its easiest way and it does not require any VB engine to get executed. In order to run the x-script code, please do the following:
You can locate the ExHelper.exe tool into the C:\Program Files (x86)\Exontrol\<control> folder, as shown:
If you can't find it there, you can always download and install it from here:
Select the component you evaluate or use, from the top-left combo, as shown:
Paste the x-script code to the exhelper's middle panel, as shown:
Convert the x-script code to your programming language, as shown:
Almost of all our components can run x-script code though methods such as
Template, ExecuteTemplate and AttachTemplate. For instance, AttachTemplate("handle
AddColumn(Column){Column{Def(48)=4;Def(49)=4;Def(52)=4;Def(53)=4}}")
changes the default-column's padding
insert the eXNETHost component to your form (you can follow the tutorial, on how to add the control to your window, form or dialog)
add the following code
The following VB6 sample shows how you can play the animated GIF using the eXNETHost component:
With NETHost1
	.Create "C:\Windows\assembly\GAC_MSIL\System.Windows.Forms\2.0.0.0__b77a5c561934e089\System.Windows.Forms.dll","System.Windows.Forms.Label"
	.Host.Template = "Image = LoadPicture(`c:/wait.gif`)"
End With
You need to change the c:/wait.gif to point to your GIF file, else the following exception may be thrown:
If you are using a different programming language, you can use the eXHelper to translate the following template:
Once you run the project you should get your animated GIF as shown next:
This is applicable only to .NET assemblies.
You can display animated GIFs by setting the Image property of a Button, Label or PictureBox to the GIF file. At runtime, you can call label1.Image = Image.FromFile("c:/wait.gif") which makes the label's background to play the animated.gif file.
An EBN file is a binary file that holds information about a skin object. The EBN file provides skin capabilities (visual appearance) for almost all of our UI components.
The visual appearance of the EBN files can be viewed within Windows Explorer, as thumbnail view, if the eXButton/COM/ActiveX component is installed.
In order to provide thumbail support for EBN files you must:
download and install the eXButton/COM/ActiveX here, /COM/ActiveX/32 for Windows 32-bit and /COM/ActiveX/64 for Windows 64-bit
open Windows Explorer and browse for the folder that display EBN files, such as C:\Program Files\Exontrol\ExButton\Sample\EBN\Assorted
select thumbnail View\Medium icons, View\Large icons or View\Extra large icons
The following screen shot shows the folder (eXButton/COM/ActiveX installed):
The following screen shot shows the folder (no eXButton/COM/ActiveX installed):
Every website requires a domain to run on. Domain names are often used to identify services provided through the Internet, such as websites, email services and more.
For instance, the following URLs show the domain name in bold:
The eXSuite/JS library is licensed to run on the domain(s) you provide at purchase time. No domain is required for /Unlimited(site) licence of the eXSuite/JS. In other words, /Unlimited license allows using the eXSuite/JS library on unlimited domains (unlimited developers inside your company). The eXSuite/JS library can run unlicensed but the message "the license is missing" may show up, and unlicensed eXSuite/JS is not fully functionable.
For the first 6 months, the price to upgrade to the configuration you need is the difference between your last purchase price and the price of the full package.
Please contact us, to provide you the link you need to pay the difference only. Please provide us the product(s) you already have and the new configuration you need.
If your last purchase time is more than 6 months ago, you can get the configuration you need by getting a renewal license using the following link
The same rule is applied if you need to upgrade from:
single component to the full suite
single to team version, team version to site version, single to site version
/COM to /ANY or /ALL, /NET to /ANY or /ALL, /WPF to /ANY or /ALL
The rule is not applicable if you need to upgrade from:
You are entitled to get the the latest released
version ( not including the source code, unless you do not have a
subscription for it ), free of charge, for 1 Year from the purchase date.
If you're happy with the product as it is, without the need for further updates,
and wish to use the installer indefinitely (/Infinite License), we offer a special pricing option for
a setup that grants perpetual usage (∞). Feel free to contact us, and we'll be happy to provide you a quote for /Infinite setup.
/Infinite License, The Infinite version of the product grants you lifetime usage and installation rights. The infinite version of the product incorporates a specific version of the component, developed up until the purchase date. This copy may not be copied or lend.
Can I request an update for my /Infinite version in the future? Yes, but you will need to purchase a 1-year renewal of your configuration using the following link. Once renewed, you will receive an updated version of your /Infinite license, while your older /Infinite license will remain functional as before.
There are several ways to get the version of the product, but all query the same ProductVersion field of the DLL's resource-module. The ProductVersion and FileVersion fields are automatically increased each time a new version is released. Binary version number for the product with which the file is distributed. The version parameter is two 32-bit integers, defined by four 16-bit integers. Binary version number for the file. The version consists of two 32-bit integers, defined by four 16-bit integers. For example, "FILEVERSION 24,0,0,5"
Here are a few ways to determine the version of the product:
Using the Version property of the control (recommended). This property is accessible in both design and runtime modes. This method provides the version of the currently running control. It's worth noting that although multiple versions of the product may coexist, only one version can be active at any given time.
When utilizing the control's installer, you'll notice that its title consistently incorporates the version of the product being installed.
Locate the DLL file in Windows Explorer (such as "exg2antt.dll"), and a tooltip will pop up, revealing the product version. This method doesn't ensure that you're actually running the specified version.
Right Click the DLL (such as "exg2antt.dll") within the Windows Explorer and select Properties\Details page. This method doesn't ensure that you're actually running the specified version.
Every product offers a detailed list of changes included in each version, typically accessible through the Release Notes or What's New section. For instance, here you can find the eXG2antt's release notes.
All of our UI controls provides methods like BeginUpdate/EndUpdate. The BeginUpdate method prevents updating the control while populating it,
while EndUpdate method resumes the updating once the populating is done. It's crucial to call EndUpdate after every BeginUpdate; otherwise,
control updates may fail during resizing, scrolling, or cursor movement. For example, if you invoke BeginUpdate three times, EndUpdate must
be called three times correspondingly.
Memory integrity is a security feature that protects Windows systems by preventing code execution from certain high-risk processes in kernel memory. It aims to safeguard against vulnerabilities like exploits and rootkits that manipulate system memory. When memory integrity is enabled, it ensures that only trusted code can run in the kernel, thereby enhancing system security. This feature is particularly important for protecting against sophisticated attacks that target system memory for malicious purposes. Memory integrity in Windows—also known as Hypervisor-protected code integrity (HVCI)—is a Windows security feature that makes it difficult for malicious programs to use low-level drivers to hijack computers.
Our components are designed exclusively as GUI components and do not incorporate any low-level functions for accessing drivers or interacting directly with the Windows kernel. They are specifically developed to operate within the user interface layer of the system, ensuring they do not need to engage with lower system layers such as kernel-level operations or direct driver access. This design approach prioritizes stability, security, and compatibility with the overall system environment, focusing solely on providing intuitive graphical interfaces without the need for deeper system integration.
The eXHelper tool is a standalone application designed to assist users in quickly finding answers to HOW-TO questions. It loads and runs several of our controls. You can run the eXHelper tool with Core Isolation enabled and verify that it functions properly. It's worth noting that our testing is conducted on physical machines rather than virtual machines.
Each component provides the documentation in following formats:
HTML format (web documentation)
CHM file, contains the control's help documentation compiled and saved in a compressed HTML format. It may include text, images, and hyperlinks. CHM files are used by Windows programs as an online help solution.
PDF format, (portable document format)
You can download the control's CHM/PDF files on your computer by:
This is mostly related to Windows security and
happen when the CHM file is copied from the internet or from one
computer to another.
After opening a CHM documentation file, a topic may not appear when you click a link from the Table of Contents.
In order to prevent this, do the following:
locate the CHM file in your Windows Explorer
right click the file, and open the Properties page
click the Unblock button, where it should say
something as: This file came from another computer and
might be locked to help protect this computer.
click the Apply button, and then click OK
Once the security message is not showing anymore, you can open the CHM file.
By default, any retail, team, site or source version of the control
installs on your development machine, the DLL that
should be redistributed with your application as described bellow. For
instance, if you have installed the eXGrid/COM, then the required DLL is
exgrid.dll could be located in your system folder, since if you have
installed the eXGrid/NET assembly, the required DLL is
exontrol.exgrid.dll which goes to the folder where the component and
samples has been installed. Shortly, the /COM require just registration
on the client machine unless you are not using it on an Isolated
Application, while the /NET assembly requires just copying it to the
same folder where the EXE application is.
!!! The development setup you have received when purchased
any of our
components must be used ONLY on your development machine, NEVER on the
client's machine.
This is applicable only
to COM objects (excepts eXNETHost).
Your package must copy and register the DLL on the client machine,
using the regsvr32 tool.
You must include all required DLLs. For instance, if you are using the
Print and Print Preview for the eXGrid, the eXPrint's DLL must be
included in the package as well. Nothing else is required. You can use
any deployment tool ( as VS 2005 ) to build your package including all
dependencies. The regsvr32 tool do register a COM object. If succeeded
the "DllRegisterServer in .... succeeded." message is
displayed. There are several alternatives to register a
component but all of them do the exactly the same: The DLL is loaded
using LoadLibrary method, the GetProcAddress is used to find the entry
for DllRegisterServer function, and once that it is found, the
DllRegisterServer function is called. If the function retrieves S_OK,
the registration is ok. For instance: regsvr32 exgrid.dll
For instance, if you are using the eXGrid/COM and eXComboBox/COM
components in your project, the required files are: exgrid.dll and
excombobox.dll. In case your application includes Print and Print
Preview feature using the eXPrint component, the exprint.dll file is
required too. So, your setup must include the files exgrid.dll,
excombobox.dll and exprint.dll. They need to be copied and registered on
the client's machine.
This is applicable only
to COM objects (eXNETHost).
Your package must copy and register the DLL on the client machine,
using the regasm tool. The Assembly Registration Tool (regasm.exe) reads the metadata within an assembly and adds the necessary entries to the registry, which allows COM clients to create .NET Framework classes transparently. Once a class is registered, any COM client can use it as though the class were a COM class. The class is registered only once, when the assembly is installed. Instances of classes within the assembly cannot be created from COM until they are actually registered. For
instance: regasm /codebase /register exontrol.NETHost.dll
This is applicable only
to COM objects in Isolated Applications (require no registration).
Your package needs to copy the DLL, without registration, in the
same folder where the EXE is installed. An Isolated COM does NOT
require registrations, so you just need to copy the DLL in the same
folder where the EXE is. An application is considered an isolated application if all of its components are side-by-side assemblies. A side-by-side assembly is a collection of resources?a group of DLLs, windows classes, COM servers, type libraries, or interfaces?available for an application to use at
runtime.
This is applicable only
to /NET assemblies (require no
registration).
The /NET Assemblies does NOT require registration ( regsvr32 ).
All you need to do is to copy the assembly files in the application folder or any other library path where they can
be located by your application. You must read the redist.txt file for more
information about files that need to be included in your package.
This is applicable only
to /WPF components (require no
registration).
The /WPF Components does NOT require registration ( regsvr32 ).
All you need to do is to copy the assembly files in the application folder or any other library path where they can
be located by your application. You must read the redist.txt file for more
information about files that need to be included in your package.
An assembly manifest is an XML file that describes a side-by-side assembly. Assembly manifests describe the names and versions of side-by-side assemblies, files, and resources of the assembly, as well as the dependence of the assembly on other side-by-side assemblies. Isolated COM allows your application to use ActiveX components without having to register them. The original vision of this was to allow copy deployment of the application, but Isolated COM has many benefits. You can have a private copy of the DLL without worrying that another application will install an older or newer copy that breaks your application. Isolated COM also allows you to successfully install and run on non-Administrator accounts.
Run the Exontrol's eXHelper (10.1) tool, select the
control/component, right-click the middle / template panel, select the
"Generate Assembly Manifest" item which generates the assembly manifest you can use in your application to use the component/assembly as Isolated
COM.
Here's a movie
that shows you how to generate the assembly manifest file (Registration-Free),
for different controls.
Starting with the installer 9.8, the registered setup provides the REDIST
node, that shows where the redistributable files are copied.
By
default, the redistributable files go to: %ProgramFiles%\Exontrol\Redistributable
folder. You can directly access this folder by paste and run the %ProgramFiles%\Exontrol\Redistributable
into your Run dialog. Please pay attention to this folder as:
if you are installing x32-version of the component on a Windows 64-bit,
the folder may be: Program Files (x86)\Exontrol\Redistributable
if you are installing x64-version of the component on a Windows 64-bit,
the folder may be: Program Files\Exontrol\Redistributable
if you are installing x32-version of the component on a Windows 32-bit,
the folder may be: Program Files\Exontrol\Redistributable
The redistributable files are also placed in your system folder
You can change the path of redistributable files, by right
clicking the REDIST node. The following screen shot shows the REDIST
node of the installer:
COM, We didn't use OCX ( Object Linking and Embedding (OLE)
) extension because it could
suggest that the product uses MFC (Microsoft Foundation Class Library). All
of our products are implemented into DLL
files. All of our products have NO dependencies to third party libraries
like mfc42.dll, msvcrt.dll, vb, and so on. For instance, the eXG2antt control's file is
ExG2antt.dll, not ExG2antt.ocx. If you like, you can rename the
ExG2antt.dll to ExG2antt.ocx, do a regsvr32 on it, and now you have an
OCX.
By default, the DLL, NET or WPF file goes
to the system folder, unless you haven't change the CONTROL
pack. The following screen shot shows the CONTROL node of the
installer:
The following samples shows how you can check if the specified
component is installed. The IsAxInstalled function has two parameters.
The szID parameter indicates the control's program identifier, while the szLicense
parameter is the control's runtime license, as explained bellow.
The szID parameter indicates the control's program identifier.
The object's program identifier is found on the control's help file. You
can search for "object's program identifier" in the control's
CHM file. The information is shown in the following format:
Tip The /COM object can be placed on a HTML page
(with usage of the HTML object tag: <object classid="clsid:...">)
using the class identifier: {101EE60F-7B07-48B0-A13A-F32BAE7DA165}. The
object's program identifier is: "Exontrol.Grid". The
/COM object module is: "ExGrid.dll"
The szLicense parameter indicates the control's runtime
license key. This key is NOT your development license key. Please check
the How do I find my
runtime license key?, or you can contact us to request your runtime
license key. If you run a runtime-less version such as a Site version,
the szLicense parameter can be empty string. The runtime license key can
not be shared.
The following samples provides the IsAxInstalled function for
different programming languages. For instance, you can check if the
exontrol's eXG2antt is installed using a code like IsAxInstalled("Exontrol.G2antt","").
C++
BOOL IsAxInstalled( LPCTSTR szID, LPCTSTR szLicense )
{
	USES_CONVERSION;
	CLSID clsid = CLSID_NULL;
	HRESULT hResult = E_POINTER;
	CoInitialize( NULL );
	if (SUCCEEDED( hResult = CLSIDFromProgID( T2OLE(szID), &clsid ) ))
	{
		CComPtr<IDispatch> spAx;
		// Checks first if we can instanciate the control using IClassFactory interface.
		if ( FAILED( hResult = CoCreateInstance( clsid, NULL, CLSCTX_ALL, IID_IDispatch, reinterpret_cast<void**>(&spAx) ) ) )
			if ( szLicense != NULL && *szLicense != NULL )
			{
				// Checks first if we can instanciate the control using IClassFactory2 interface.
				spAx = NULL;
				CComPtr<IClassFactory2> pCF2;
				if (SUCCEEDED(CoGetClassObject(clsid, CLSCTX_ALL, NULL, IID_IClassFactory2, reinterpret_cast<void**>(&pCF2))))
					hResult = pCF2->CreateInstanceLic(NULL, NULL, IID_IDispatch, T2OLE(szLicense), reinterpret_cast<void**>(&spAx));
			}
		spAx = NULL;
	}
	CoUninitialize();
	return SUCCEEDED( hResult );
}
C#
public bool IsAxInstalled(string szID, string szLicense)
{
    try
    {
        AxInstall n = new AxInstall(szID);
        if (n != null)
        {
            System.Reflection.FieldInfo f = typeof(AxHost).GetField("licenseKey",
                                    System.Reflection.BindingFlags.NonPublic |
                                    System.Reflection.BindingFlags.Instance);
            f.SetValue(n, szLicense);
            Controls.Add(n);
            Controls.Remove(n);
            n = null;
            return true;

        }
    }
    catch (Exception e)
    {
    }
    finally
    {
    }
    return false;
}
where the AxInstall class definition is:
public class AxInstall : AxHost
{
    public AxInstall( string szID )
        : base(Type.GetTypeFromProgID(szID).GUID.ToString())
    {
    }
}
or if you are using site/runtime-less version, you can use the
following code:
public bool IsAxInstalled(string szID, string szLicense)
{
    try
    {
        object o = null;
        o = Activator.CreateInstance(System.Type.GetTypeFromProgID(szID));
        if ( o != null )
            return true;
    }
    catch (Exception e)
    {
    }
    finally
    {
    }
    return false;
}
Private Function IsAxInstalled(ByVal szID As String, ByVal szLicense As String) As Boolean
On Error GoTo fail
    If Not (Len(szLicense) = 0) Then
        Licenses.Add szID, szLicense
    End If
    Dim o As Object
    Set o = Controls.Add(szID, "oTest")
    Controls.Remove oTest
    IsAxInstalled = True
    Exit Function
fail:
    IsAxInstalled = False
End Function
Instead Controls.Add method can be replaced by CreateObject method.
The VB6's CreateObject creates and returns a reference to a COM object.
VB/NET
Private Function IsAxInstalled(ByVal szID As String, ByVal szLicense As String) As Boolean
    Try
        Dim n As New AxInstall(szID)
        If Not (n Is Nothing) Then
            Dim f As System.Reflection.FieldInfo
            f = GetType(AxHost).GetField("licenseKey", Reflection.BindingFlags.NonPublic Or Reflection.BindingFlags.Instance)
            f.SetValue(n, szLicense)
            Controls.Add(n)
            Controls.Remove(n)
            IsAxInstalled = True
            Exit Function
        End If
    Catch e As Exception
    End Try
    IsAxInstalled = False
End Function
where the AxInstall class definition is:
Public Class AxInstall
    Inherits AxHost

    Public Sub New(ByVal szID As String)
        MyBase.New(Type.GetTypeFromProgID(szID).GUID.ToString())
    End Sub
End Class
or if you are using site/runtime-less version, you can use the
following code:
Private Function IsAxInstalled(ByVal szID As String, ByVal szLicense As String) As Boolean
    On Error GoTo fail
    Dim o As Object = Nothing
    o = Activator.CreateInstance(System.Type.GetTypeFromProgID(szID))
    If Not (o Is Nothing) Then
        IsAxInstalled = True
        Exit Function
    End If
fail:
    IsAxInstalled = False
End Function
You must set the RuntimeKey property as explained in
the redist.txt file in the section: B> Runtime License Key. You can find
your registered key in the e-mail you received initially when purchased
the component as follows: Your runtime license key is "...".
Please read the redist.txt file for more information about using your
runtime license key.
Usually it is happen when using the license key from
another products, or when using the runtime license key instead your
development license key. The development key can be found on your
registration email in xxxx-xxxx-xxxx-xxxx format. The development
license key is always generated based on your registration details at
purchasing time. The development license key and runtime license key are
different and can not be used one with another. The development license
key is only required when you install the product on your development
license key. The runtime license key is required when inserting
components at runtime ( by code ), or when running /NET Assemblies.
You are entitled to get the the latest released version (not including the source code, unless you do not have a
subscription for it ), free of charge, for 1 Year from the purchase date.
You can find more details here.
Shortly, this problem is ALWAYS related to the runtime
license key that's missing on the client machine. When you purchased the
component you received a development license key, that helps you to
install the development setup on your machine. Let's call it the
development machine. On the client machine, you need to copy
and register the component. Never install the development setup, on
the client machine, please check the license issue. The major difference
between the client machine and the development machine is that on the
client machine you will not be able to open the form that contains the
component, in design mode.
Now, why the runtime license key is missing
on the client's machine, so I can't run my application?
Often it is
happen because you started the application using the demo version, and
you didn't replace the old instances of the component like explained here
you have created the control at runtime, without using runtime
license key explained here
On the development machine, please do the following :
The Microsoft Visual DevStudio setup installs in the
C:\Program Files\Microsoft Visual Studio\Common\Tools ( C:\Program
Files\Microsoft Visual Studio .NET\Common7\Tools\Bin ) a tool called
Dependency Walker ( depends.exe ). If you want to find the control
dependencies you need to run the Dependency Walker tool, and to open the
control's DLL The tool opens a new window where the control dependencies
are displayed.
Once that you have purchased an Exontrol product, you
will receive a new setup that contains the retail, source, or site
version for the product. You have to use the development license key only with
version you received. You cannot use the development license key for demo/trieal
setup file.
The registered setup that you receive when you
purchase a component, doesn't contain any CAB file. In order to build
your own CAB file, you need to check the "Packaging ActiveX
Controls" article.
Shortly, a CAB file contains the components and a INI file that holds
information about components. See Also: Using
Exontrol components in Internet Explorer.
The CAxWnd class calls OnEvent callback function each time when
hosted control fires an event. The OnEvent function carries the
following arguments:
LPARAM lParam. An application extra data. The value of lParam is
the same with the value passed to lParam when the
CAxWnd::AxCreateControl function is called.
DISPID event. The event argument identifies the control's event
identifier. Each event is represented by an unique identifier. You
can use the OLE View tool to inspect the control's type library
where you can find all events, their identifier and their
definitions.
DISPPARAMS* pParameters. The pParameters argument carries
information about the parameters of the event.
For instance, let's say that we want to handle the MouseMove event
of the exComboBox control. The definition for the MouseMove event in
the control's type library is:
[id(0xfffffda2), helpstring("Occurs when the user moves the mouse."),helpcontext(0x00000324)] void MouseMove(
                short Button,
                short Shift,
                OLE_XPOS_PIXELS X,
                OLE_YPOS_PIXELS Y);
The id defines the event's identifier so, for MouseMove event the
event's identifier is 0xfffffda2. Also, we can deduce that the number
of arguments of the MouseMove event is 4 ( four ). So, when OnEvent
callback function is invoked the event argument is 0xfffffda2, and the
pParameters argument holds information about the parameters of the
MouseMove event. The pParameters->cArgs gets the count of event
parameters. In this case it is 4. The pParameters->rgvarg[0] points
to the last parameter from event's definition, in this case
pParameters->rgvarg[0] stores the Y parameter of the MouseMove
event. The the pParameters->rgvarg[1] points to the X parameter of
the MouseMove event, the the pParameters->rgvarg[2] points to Shift
argument of the MouseMove event, and the the pParameters->rgvarg[3]
points to the Button parameter of the MouseMove event. The following
OnEvent callback handler displays the event's identifier and the list
of its parameters to dialog's title ( the lParam parameter points to
owner dialog ) :
Yes, you may start developing your application
using any DEMO/TRIAL version. If you are doing a test application, you are
free to do anything that you want. Instead, we do not recommend
starting developing a real application using the DEMO version.
The main difference and the most important, between
DEMO and RETAIL configurations is that the DEMO version doesn't contain any runtime
license information, and the RETAIL version does. And so what?
Here's a scenario. If you start using the DEMO version to build
your application, the container won't save the control's runtime
information (simple because the DEMO version doesn't not contain the
runtime license information) into container's persistence. Once that
you have decided that the product matches your requirements and you
get the RETAIL version, the application won't work because the
RETAIL version requires runtime license information, and the DEMO
version didn't save such of information in the container's
persistence.
If you started the application using the DEMO
version before you purchased it, you need to REPLACE ALL instances of the control
so the control's runtime license key is saved in the container's persistence, else
your application won't work on the client's machine. Your application MUST be built on the development
machine, on the machine where you have installed the registered setup using your development license key.
In conclusion, in order to integarte properly the purchased component to your application do the following on your development machine:
install the component, using the development license key you
received ( make sure that no error occurs during installing,
such as a project is using one of the component you are trying
to install )
open each form the component has been placed during your
evaluation, remove it, and places it again ( this way you ensure
that the new registered version is properly added to the form )
save the project
build the EXEcutable.
Now, go to the client machine and to the following:
copy the EXEcutable among with the DLL(s) of the component(s)
you purchased
(VB) HOW TO: Dynamically Add ActiveX Controls that Require
Run-Time Licenses in VB.
Private Sub Form_Load()
    Dim obj As Object
    Licenses.Add "Exontrol.Tree", "xxxxxxxxxx"
    Set obj = Controls.Add("Exontrol.Tree", "tree", Me)
    obj.Visible = True
End Sub
(VB.NET) HOW TO: Dynamically Add ActiveX Controls that
Require Run-Time Licenses in VB.NET (326651).
Imports System.Windows.Forms

Public Class AxTree
    Inherits AxHost

    Public Sub New()
        MyBase.New("3C5FC763-72BA-4B97-9985-81862E9251F2")
    End Sub
End Class

Public Class Form1

    Private Sub Form1_Load(ByVal sender As System.Object, ByVal e As System.EventArgs) Handles MyBase.Load
        Dim n As New AxTree
        Dim f As System.Reflection.FieldInfo
        f = GetType(AxHost).GetField("licenseKey", _
            Reflection.BindingFlags.NonPublic _
            Or Reflection.BindingFlags.Instance)
        f.SetValue(n, "xxxxxxxxxx")
        Controls.Add(n)
    End Sub
End Class
(C#) HOW TO: Dynamically Add ActiveX Controls that Require
Run-Time Licenses in C# (326652)
using System;
using System.Collections.Generic;
using System.ComponentModel;
using System.Data;
using System.Drawing;
using System.Text;
using System.Windows.Forms;

namespace WindowsApplication2
{
	public partial class Form1 : Form
	{
		public class AxTree : AxHost
		{
			public AxTree() : base("3C5FC763-72BA-4B97-9985-81862E9251F2")
			{
			}
		}

		public Form1()
		{
			InitializeComponent();
		}

		private void Form1_Load(object sender, EventArgs e)
		{
			AxTree n = new AxTree();
			System.Reflection.FieldInfo f =
			typeof(AxHost).GetField("licenseKey",
			System.Reflection.BindingFlags.NonPublic |
			System.Reflection.BindingFlags.Instance);
			f.SetValue(n, "xxxxxxxxxx");
			Controls.Add(n);
		}
	}
}
(C++) HOW TO: Dynamically Add ActiveX Controls that
Require Run-Time Licenses in C++.
a) MFC: This code is applied to VC++ 6.0 and
prior version. The code is NOT applicable on greater versions of
VC++, such as 2005, 2008, ... On these the VS environment knows
to handle runtime-licensed controls. So, on C++ 6.0 you need to
use the Create definition with bstrLicKey parameter (
from the control's wrapper class ) as shown bellow:
You need to add the following code to your OnInitDialog
function.
if ( m_control.GetControlUnknown() == NULL )
{
	// creates the control at runtime
	CRect rtClient; GetClientRect( &rtClient );
	m_control.Create( _T(""), WS_VISIBLE + WS_CHILD, rtClient, this, IDC_CONTROL, NULL, FALSE, L"xxxxxxxxxx" );
}
where the m_control is the control, and the IDC_CONTROL is the
identifier of the control in the dialog that hosts it. Attention! the runtime license string
is
provided by us free of charge, at your request. Your development
license key is NOT the control's runtime license key! The 'xxxxxxxxxx'
is not a valid runtime license key!.
Let's say that you are using the eXG2antt/COM component on a
VC++ project with MFC support. So, the code to be added on the
OnInitDialog looks as follow:
if ( m_g2antt.GetControlUnknown() == NULL )
{
	// creates the control at runtime
	CRect rtClient; GetClientRect( &rtClient );
	m_g2antt.Create( _T(""), WS_VISIBLE + WS_CHILD, rtClient, this, IDC_G2ANTT1, NULL, FALSE, L"xxxxxxxxxx" );
}
The m_g2antt is of CG2antt type, where the CG2antt was
generated by the MFC Class Wizard.
The control's wrapper contains two definitions for Create
function and the code being added on OnInitDialog is using the
following definition:
b) ATL:
AtlAxWinLic7 is the name of a window class that helps provide
ATL's control-hosting functionality for licensed controls.
When you create an instance of this class, the window
procedure will automatically use the control-hosting API to
create a host object associated with the window and load it
with the control that you specify as the title of the window.
If you are not familiar with the IClassfactory2 interface, you
might read first the article Q151771.
Anyway, we can provide a class CAxWnd ( C++ based, no MFC ), that helps
users to create and host licensed or unlicensed ActiveX controls
in C++ projects ( please contact us in order to get the source
code for the CAxWnd class ). The CAxWnd class is able to handle
control' events too. You need to insert the axwnd.h and
axwnd.cpp files into your C++ project, and to call
CAxWnd::AxCreateControl function, like in the following sample.
The AxCreateControl function takes the following parameters: the
handle to the parent window, the rectangle where the ActiveX
should be created, the control's identifier( like MSCAL.Calendar
), the license string (Attention! the runtime license string is
provided by us free of charge, at your request. Your development
license key is NOT the control's runtime license key! The 'xxxxxxxxxx'
is not a valid runtime license key! ), an extra data and a callback function that is
invoked when the hosted ActiveX control fires an event.
(Delphi) HOW TO: Dynamically Add ActiveX Controls that
Require Run-Time Licenses in Delphi
Opens the control's wrapper declaration ( TLB file ) of the
control's type library. Let's say you are using the exontrol's
exg2antt control. Delphi generates a class wrapper in the unit EXG2ANTTLib_TLB,
so open this unit. Inside the file, search for LicenseKey
field.
Generally, the Delphi environment generates a code such as: LicenseKey: nil (*HR:$80004002*);
This definition must be replaced as follows:
CLicenseKey: array[0..X] of Word = ( xxxxxxxxxx );
This is usually happen when the user that makes
the registration doesn't have access to the OLE registry key. In
this case you have to make sure that you have access to the
HKEY_CLASSES_ROOT registry key. The HKEY_CLASSES_ROOT (HKCR) key
contains file extension associations and COM class registration
information such as ProgIDs, CLSIDs, and IIDs. In order to make sure
that you have access to that key, open the regedit tool ( of course
if you have access to regedit:), and tries to create a new key. On
32-bit Microsoft Windows systems, a user must have the correct
permissions for access to the system registry. Change your
permissions or have them changed by the system administrator.
This is happen because the component is not able
to read the encrypted license key, from the OLE registry. You must
be sure that the user has the full access to HKEY_USERS key. You can
use the regedt32 editor to change the rights of the user on the
machine.
Symptoms: A Visual Basic program runs properly on the
development computer. The executable file, along with the
associated control (.OCX) and .DLL files, are copied to another
computer. Attempting to run the program on the other computer
results in the error 424 with the following message: You do not
have an appropriate license to use functionality.
Cause:
- The controls or DLLs used by the program were not registered
in the system registry of the other computer.
- Some controls used by the program require dependency files
that need to be installed and registered in the other computer.
- Some files, such as those for JET, are required to be in
specific directories.
MORE INFORMATION
- Visual Basic uses substantially more OLE components. These
components have dependency files and require system registry
modifications. Even if another setup program is used, Setup
Wizard should be run on your application to allow the Wizard to
determine all the necessary files needed by your program.
- A simple way to your project dependencies is to open the vbp
file using the notepad. Check each Reference or Object values.
Make sure that you will include these files on the setup, or
make sure that these files exist on the test machine.
- You have to build your application on the computer where the
Exontrol products were installed! Don't try to build the
application on a computer where an Exontrol product was only
copied and registered!
Yes. All of our components implement the
IObjectSafety interface as safe for initialization and safe for
scripting. The IObjectSafety interface should be implemented by
objects that have interfaces that support untrusted clients (for
example, scripts). This allows the owner of the object to specify
which interfaces need to be protected from possible untrusted use.
The Retail or Source Code version requires a
runtime license key on the client machine. The Demo or Site Wide
version doesn't require a runtime license key on the client machine.
You've got the message because the control is not allowed to be used
in design environment on the client machines. Your application
includes the runtime license key of the component, so that's why
your application is working. Your application uses the runtime mode
on the client machine, but it includes a runtime license key that
was saved on the development machine. Let's suppose that a control
has no runtime license key. What that means? That means that any
customer that installs your application will be able to use and
build application using the components that your application
installs, and it is not allowed. If your application fails to run on
the client machine due to a license problem, you have to be sure
that the application itself doesn't use the component in design
mode.
We can provide you the information/data you
request like setup / development license key / runtime license key
/ changing the registered email address, while your maintenance
is not expired.
If your maintenance is expired, you must renew your maintenance
before requesting any of these information/data. You can find here
the prices to renew your maintenance. Once you renew your maintenance,
please provide us any information we can locate you on our side,
in case you were using any email address that you do not have registered
with us when you originally purchased the component.
The license is per developer, not machine. All of our controls are royalty-free and run-time license-fee free.
For instance: I am a single-developer company and work with 3 computers, one
at home, one at work, safety reserve (laptop). In this case you need to lookup
for Single-Developer license.
For instance: In my project it works 3-developers, but each developer is
using the project on different machines. In this case you need to lookup for
Team-Developer license.
In conclusion, you need to purchase one copy per developer on the project. This means "one for EVERY developer on the project.", not " one copy per developer using the control".
All of our controls are royalty-free and run-time license-fee free. This means that when you purchase our products, you may distribute the component you purchased with your
applications without paying any run-time fees to us. The Site-Developer license allows you to use the component by any developer, on any machine, inside your company (single-mail-address).
An assembly manifest is an XML file that describes a side-by-side assembly. Assembly manifests describe the names and versions of side-by-side assemblies, files,
and resources of the assembly, as well as the dependence of the assembly on other side-by-side assemblies. Isolated COM allows your application to use ActiveX components
without having to register them. The original vision of this was to allow copy deployment of the application, but Isolated COM has many benefits. You can have a private
copy of the DLL without worrying that another application will install an older or newer copy that breaks your application. Isolated COM also allows you to successfully
install and run on non-Administrator accounts.
Shortly, you need to generate the manifest assembly file for all \ components you use in your project, and create a global manifest file that includes
all <file> and <comInterfaceExternalProxyStub> fields as explained
bellow.
You can use the eXHelper tool to generate the assembly manifest for each component.
This message occurs once your maintenance period ends. We would like to remind
that the application already built using any of our components will continue to
work, no matter if your maintenance is expired.
Once you renew the product(s) after expiration you get:
your subscription starts once we receive your renewal order ( placed and paid )
during this time you are notified by e-mail about the latest changes of the products you subscribed for
your subscription provides product releases, updates (major and minor) while your subscription is active
In addition, in case you are forced to use a specific version of the product,
you need to send us the last development setup you used. Based on the internal-information we get from the development setup
you sent, we will re-build the development
setup to compile the version as you used, and we send you back the new
development setup that allows you to install and use the version you require.
The license key you received must be used with the development setup that installs the retail version of the component. The license key cannot be applied in evaluation setups, as trial versions cannot be converted to retail versions. The license key must be entered into the License field as depicted in the image below:


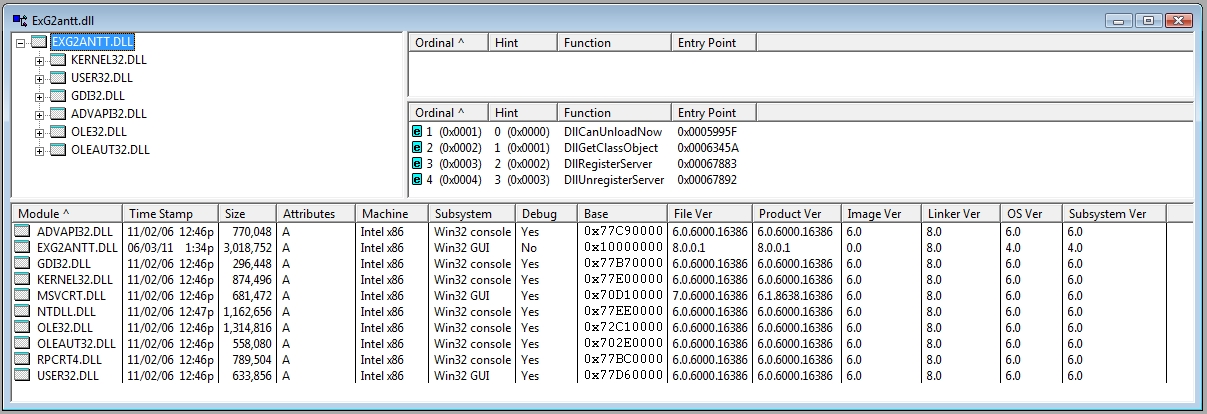
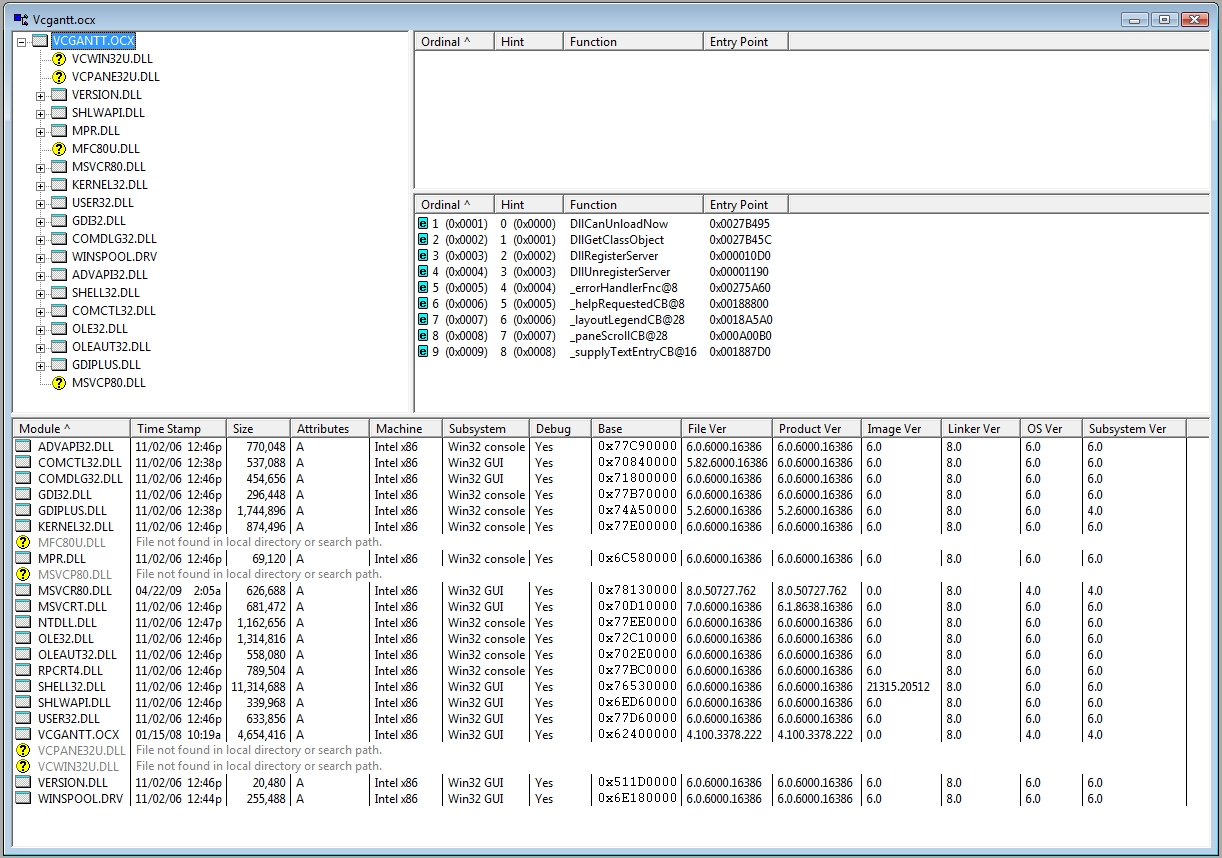
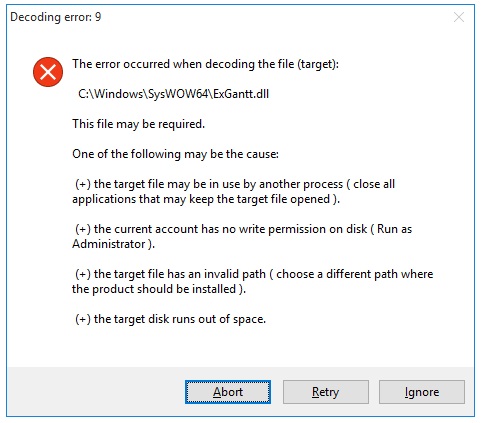
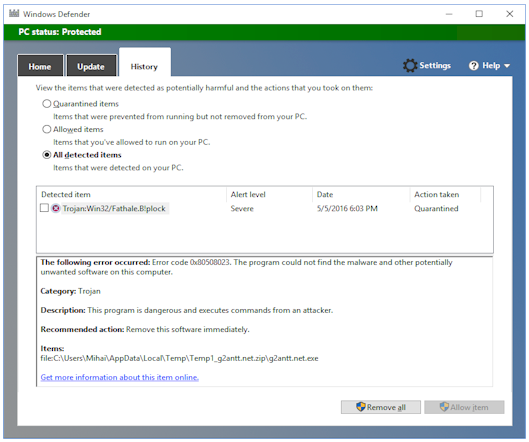
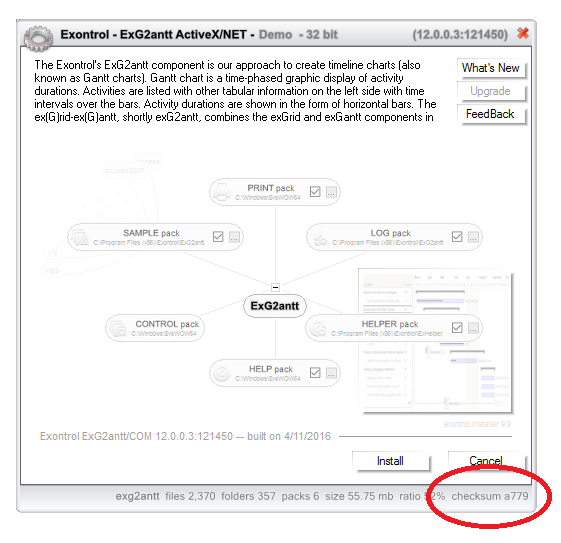
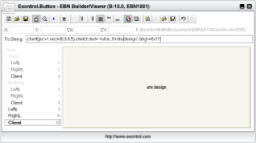
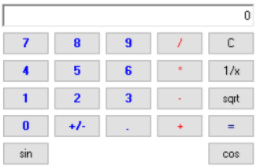
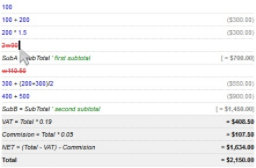

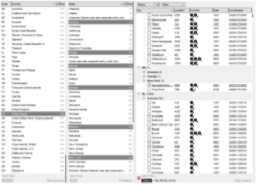
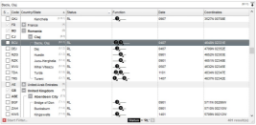
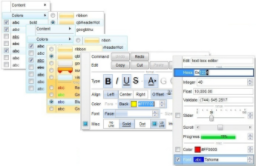

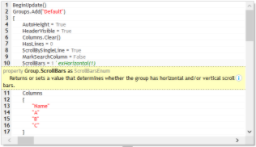
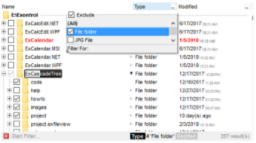

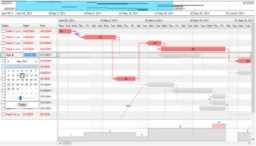
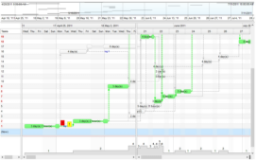
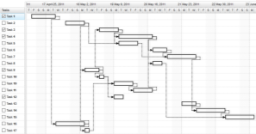


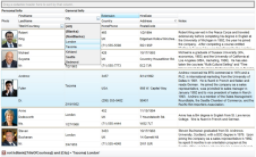
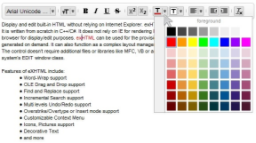
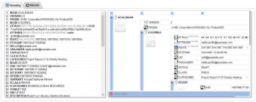
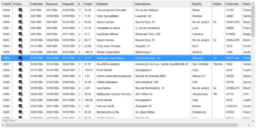
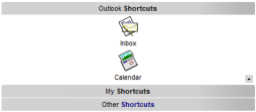
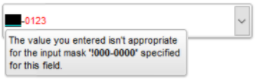
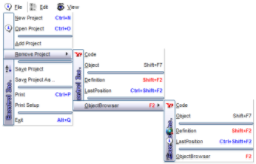
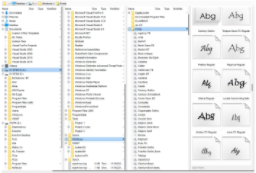
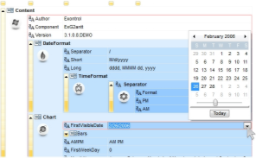
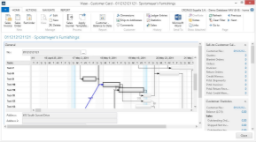
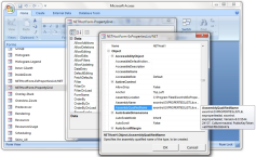
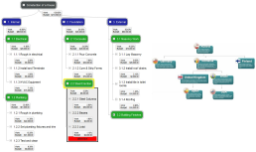
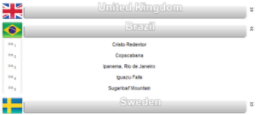
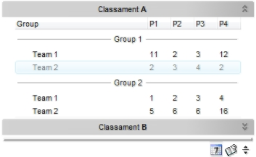
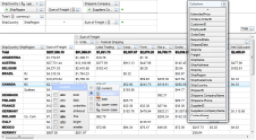
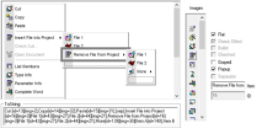
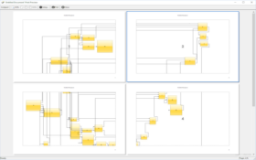
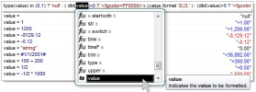


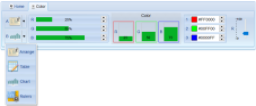
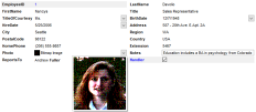
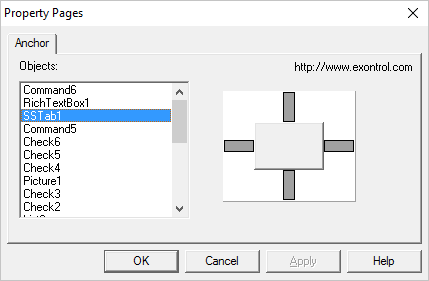
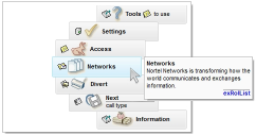
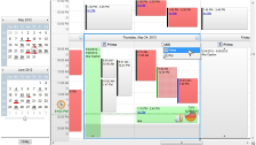
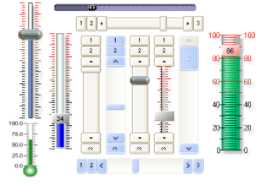
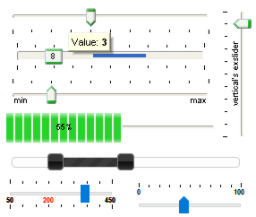
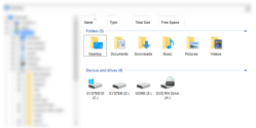
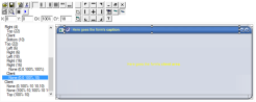
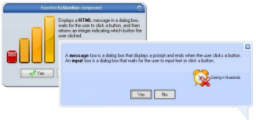

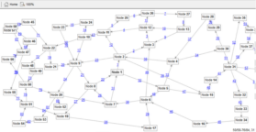
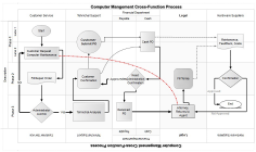
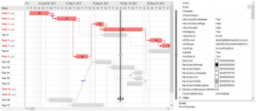
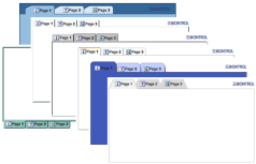

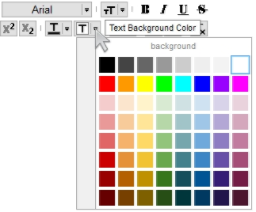
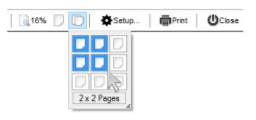

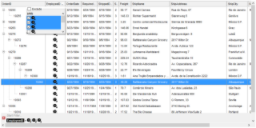

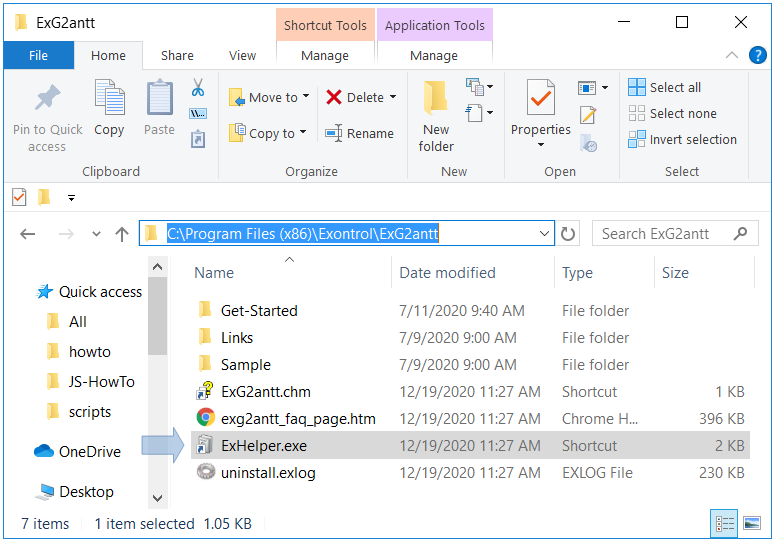
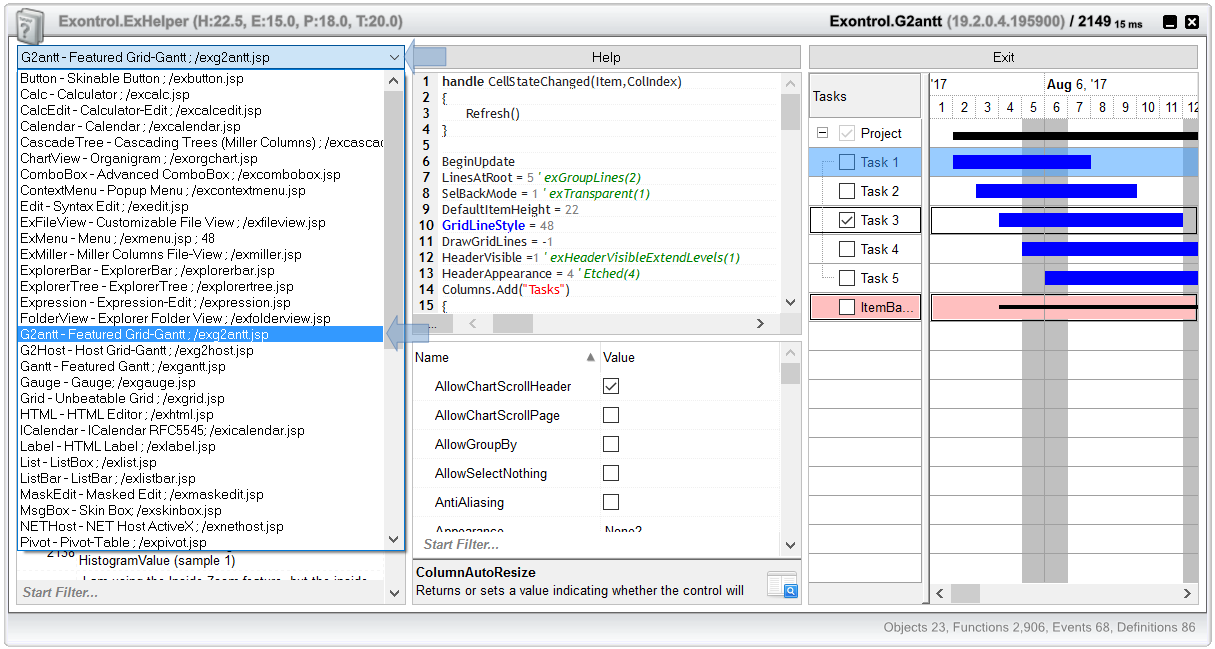
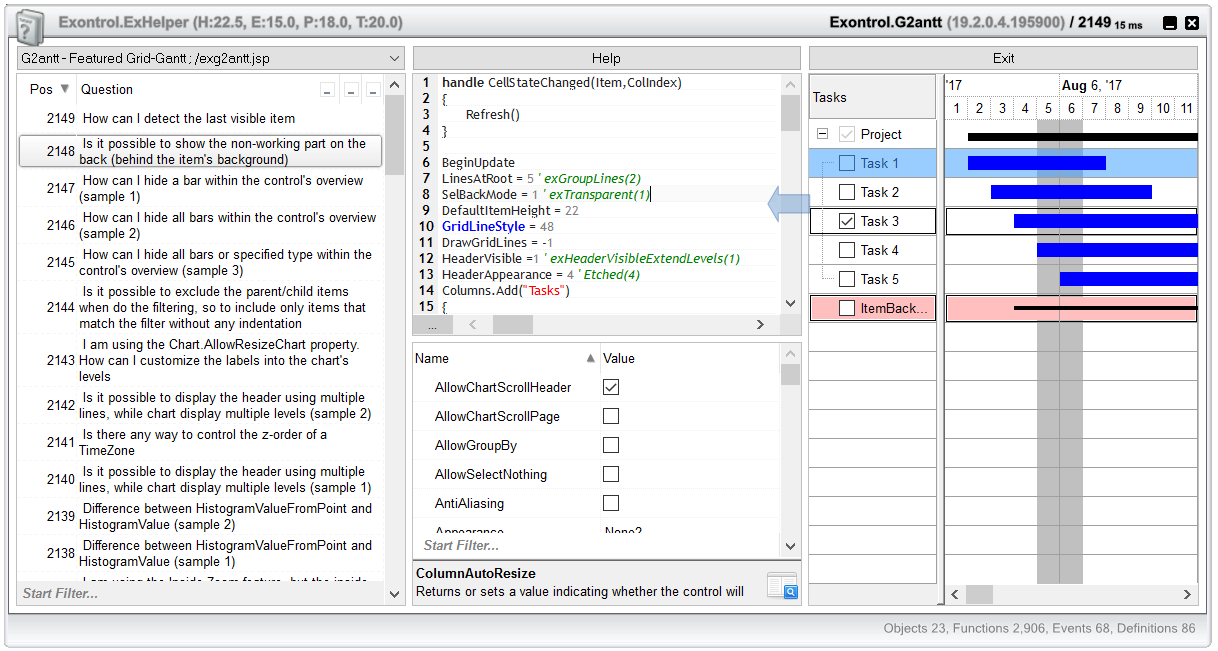
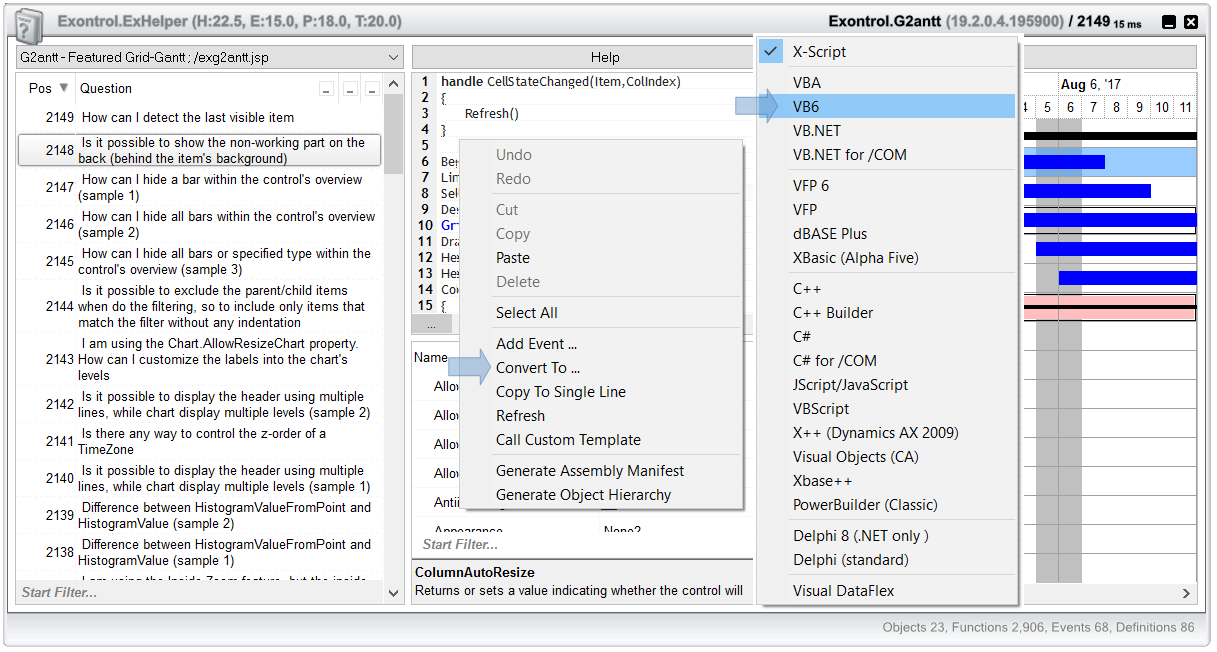

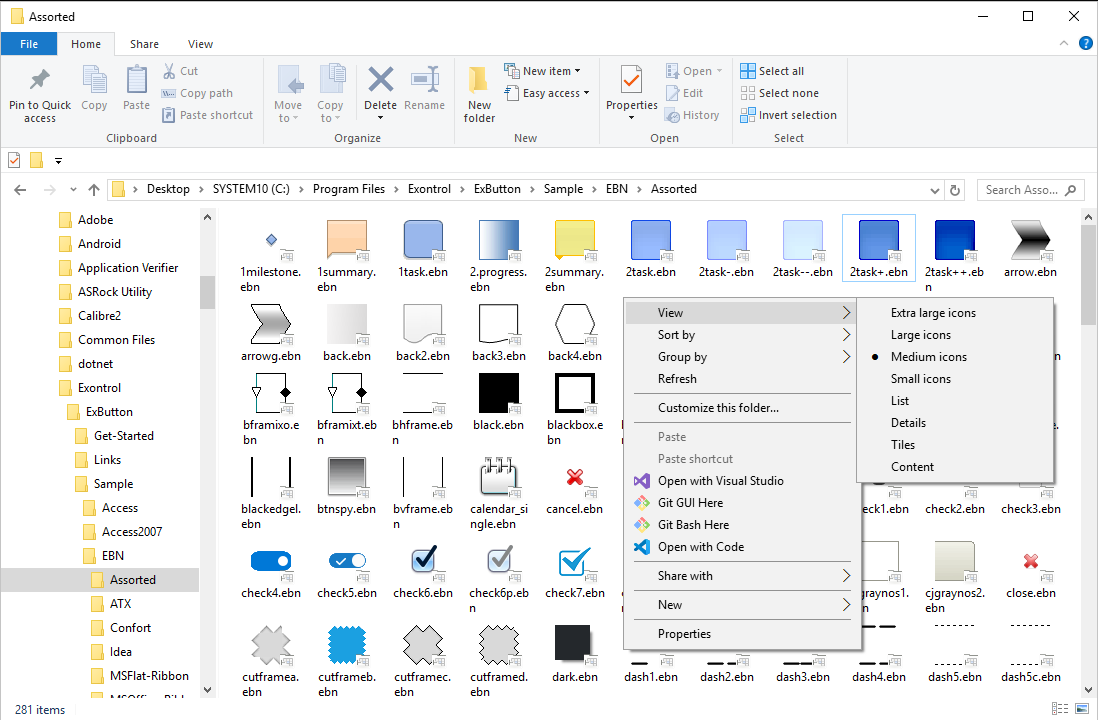
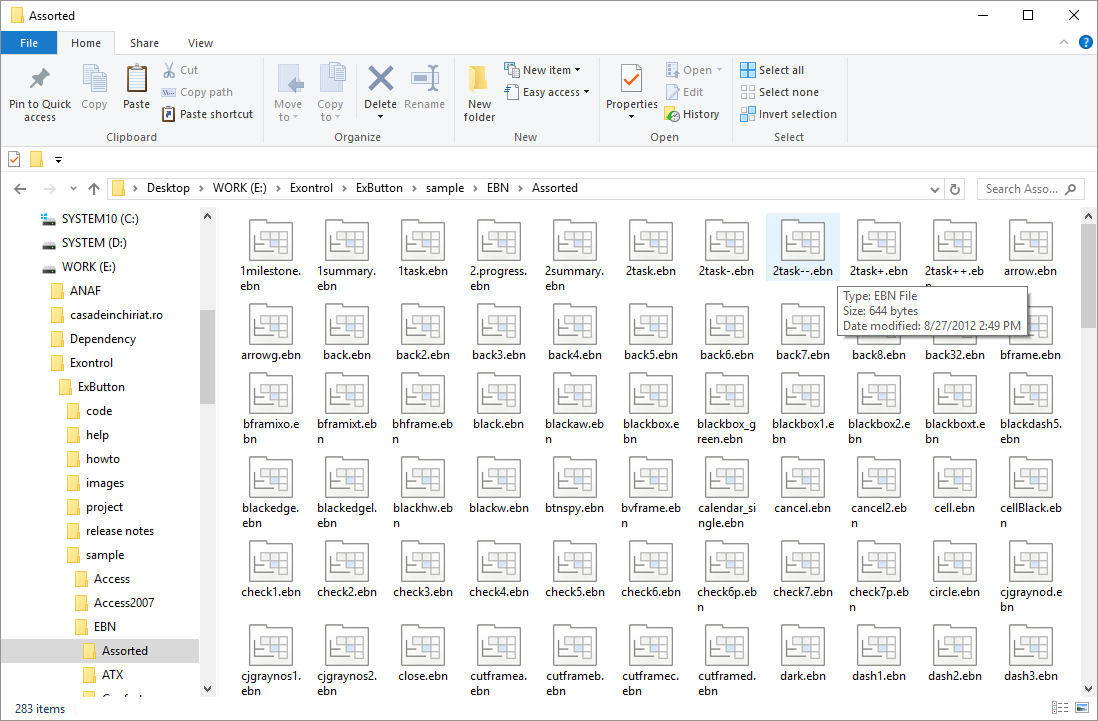
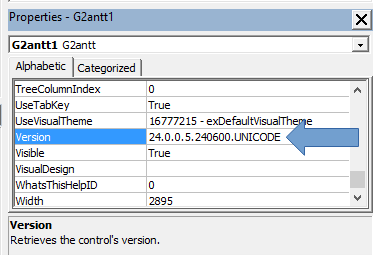
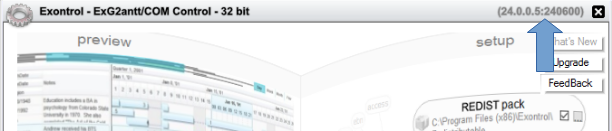
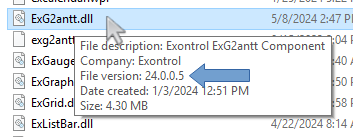
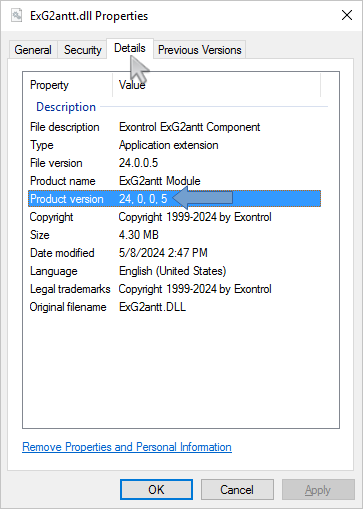
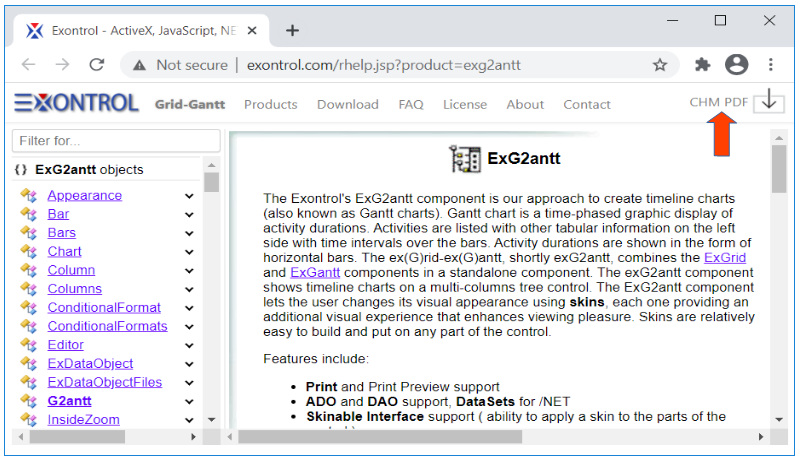
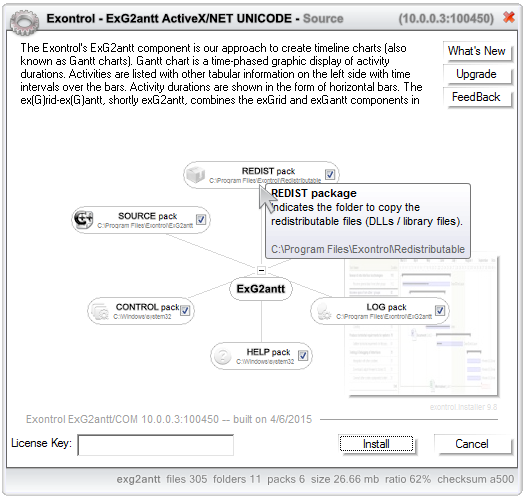

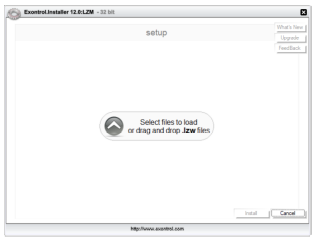
